Meet New ASCB Vendor Eve Mobley of Cedar + Fawn

SONY DSC
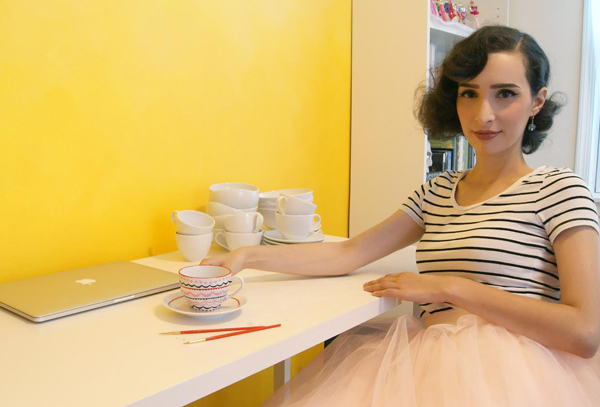
I’m Eve Mobley, the illustrator working as Cedar + Fawn, based in Baltimore. I studied digital illustration in my undergrad, it wasn’t until I took an internship as a display artist at Anthropologie that I really fell in love with household objects as art. Cedar + Fawn actually began as my Senior Thesis project, and I’ve just kept it going ever since!
SONY DSC

I have a love affair with the romanticized image of the 50’s-era housewife, which is why so much of my work is geared towards the domestic setting, specifically the kitchen and dining. My illustrations are also influenced by feminine fashions, Parisian imagery, and colorful Scandanavian design.
SONY DSC

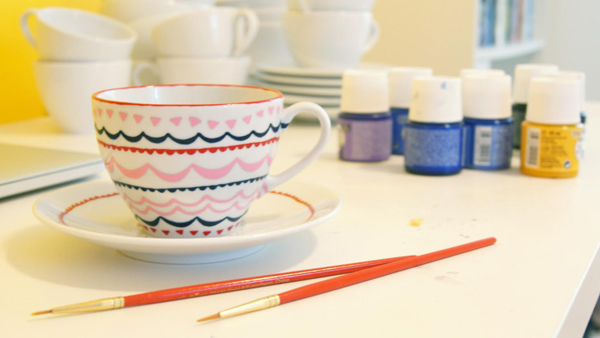
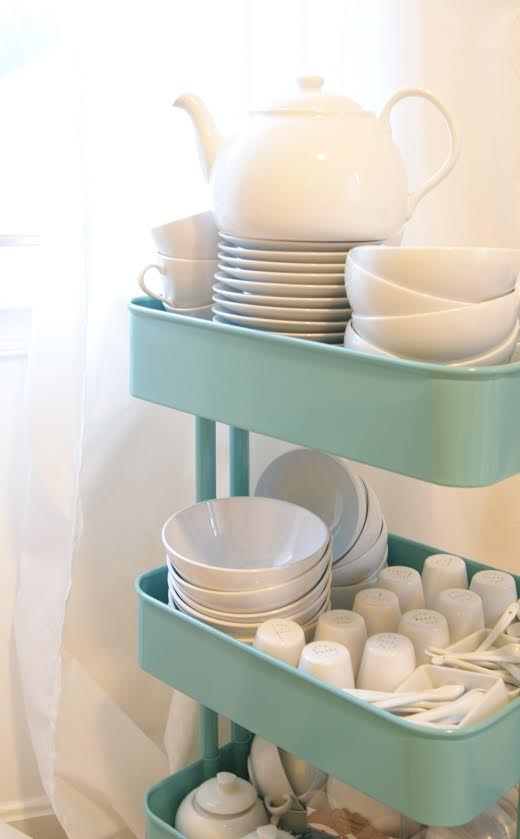
I collect all my “blank” dishes from restaurant supply wholesalers, but occasionally I’ll score a vintage piece or two and do a special limited edition design. I’m very picky about the shape and form of the dishes I will buy to paint on. Because my illustrations are so minimal, every detail of the final object—how it looks on the table and how it feels in the hand—is extremely important.
SONY DSC

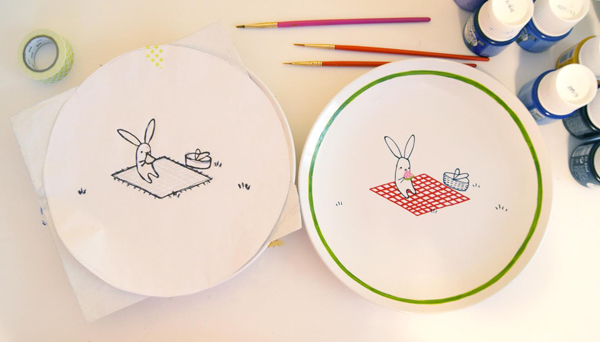
First I mark guides on the ceramic using a soft pencil or carbon paper, and then I use an overglaze technique to paint. As yes, I hand-paint each and every dish! Luckily, the more I repeat a design, the faster I get at painting it! After the paint is dry, the piece is fired again to set the paint and make the design permanent, food safe, and dishwasher safe. It’s just as important to me to make a functional piece as it is to make a beautiful one!
Cedar_Fawn6

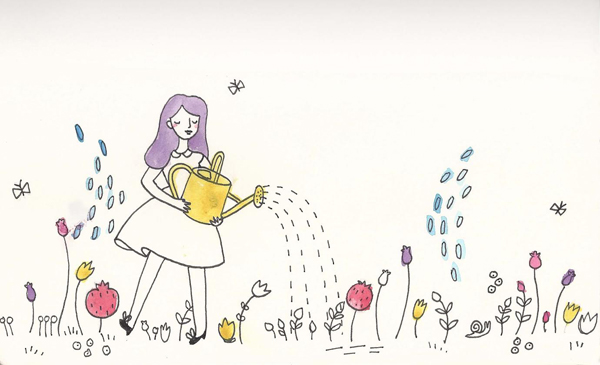
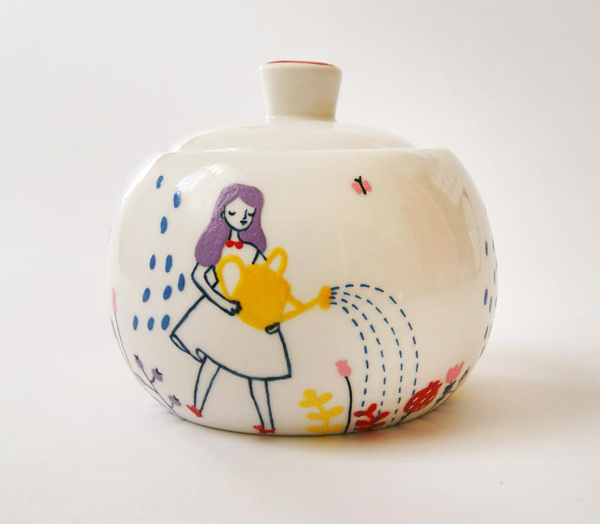
More often than not, the illustration you see on a dish is a doodle copied straight from my sketchbook. I try not to make too many revisions from paper to plate, because that relaxed, lazy line of the original doodle is exactly what makes the image so charming! The warm and approachable personality of an airy doodle is the perfect complement to the solidity of a heavy ceramic dish.
SONY DSC

You can find my work for purchase online, as well as at all of the Charm City Craft Mafia’s shows. To see all designs past and present, and to take a peek at my 2D illustrations, check out evemobleyillustration.com!
—————————————————————————————————————–
Make sure to check out Eve’s work at our upcoming Art Star Craft Bazaar in Asbury Park on July 25th + 26th. This will be her first Art Star event!

Posted in artist spotlight, ascb, Featured Artist, Uncategorized | Tagged , , , , , , , | Leave a comment

Make This: Avocado Seed Pendant

Photos and Tutorial by Christie Sommers

pic8

If your household goes through as many avocados as mine, you may have thought “there must be something I can do with all these pits!” (cue exasperated infomercial actor). Well there is! In fact there are a few things you can can do with them. I will walk you through two options over the course of this,and my next, tutorial for Art Star. In this tutorial, I will show you how to make a hand carved pendant, and later this month I will show you one way to turn the carving scraps and pit skins into a natural dye. So save those scraps!

You will need:

Pic 1

*Hass avocado pits (at least two)

*Xacto blade or other carving tools. No experience necessary! I have no “official” carving training aside from a brief period of self taught printmaking. Just proceed with caution, these tools are sharp! You can get creative with items in your kitchen or toolbox. Use a Phillips head screwdriver for “x” shapes, metal skewers for dots, drag a fork for perfectly spaced lines…. you get the idea.

*a drill or Dremel for making holes

*a length of rope or string from which to hang your pendant (I used waxed cotton cord, hemp works well too)

You will need to allow your your seeds to dry out for at least 3 days before carving. No more than around 2 weeks or they will shrivel up and solidify, making them very difficult to carve.

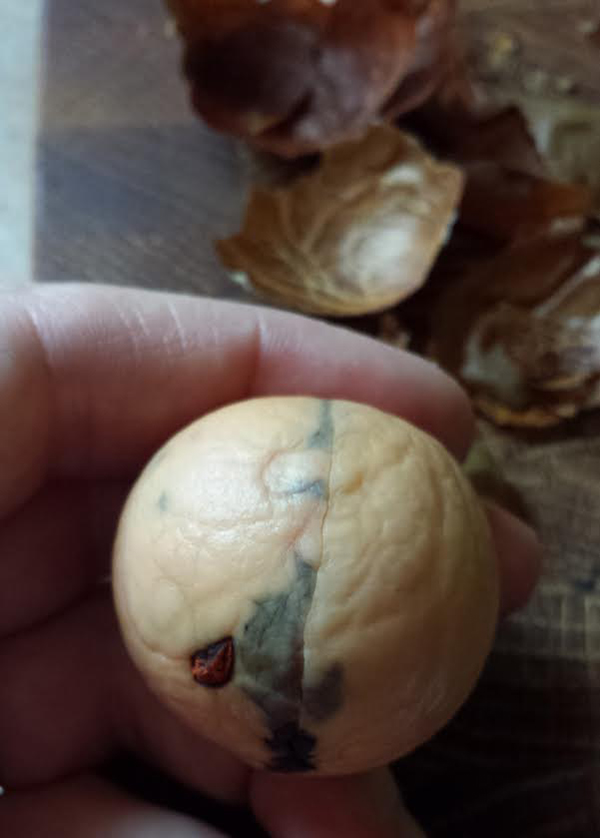
Avocado seeds are dicots. Simply put, they are in two parts. You need to find the natural split that separates the two sides. If you don’t split them prior to carving, they will split on their own later.. most likely straight through your nice design. I learned this one the hard way.

After your seed has dried for a few days, peel the outer layer of skin away and set skin aside.

Pic 2

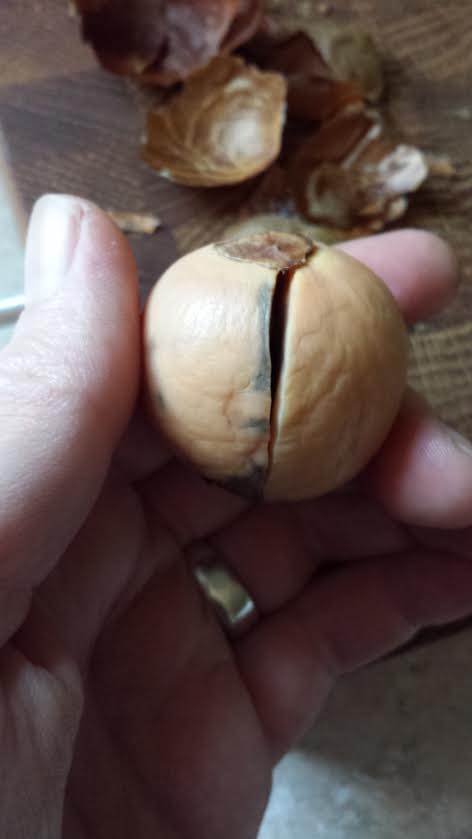
Pinch the seed between your thumb and forefinger until the natural split begins to appear.

Pic 3

You may need to stick a flat head screwdriver into the split to pry them apart, otherwise just get a finger in there to separate.

Pic 4

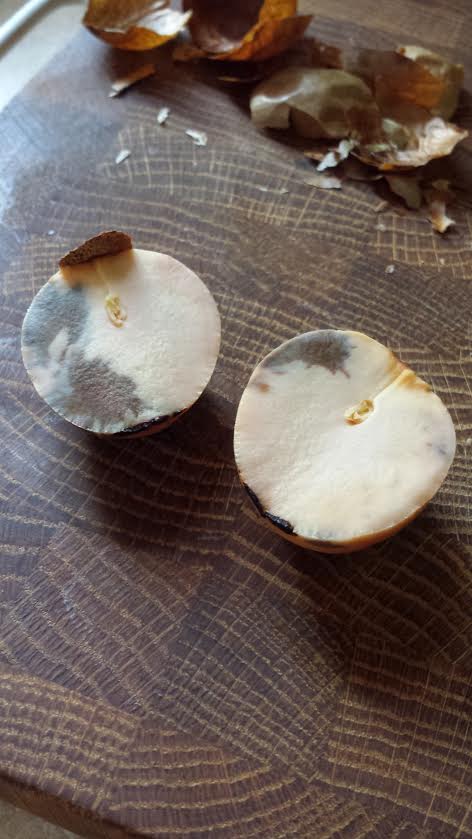
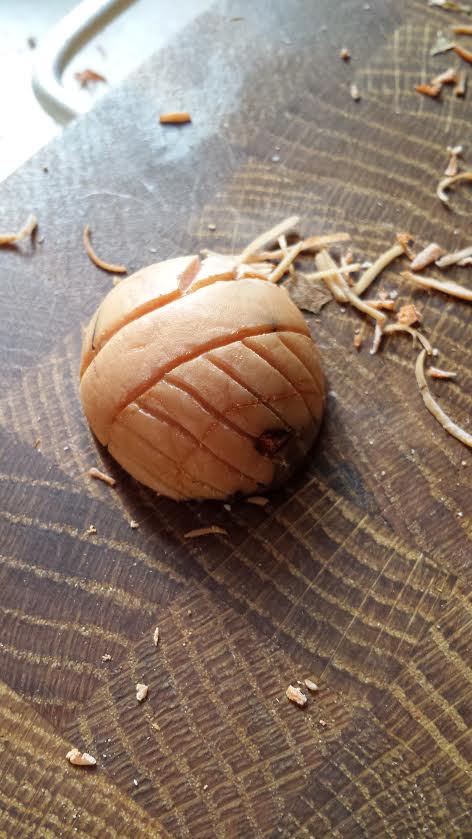
You now have two halves… two potential pendants.

Pic 5

Start by deciding where you would like to drill the hole for your string. Don’t go too close to edge if you want to avoid unwanted cracks.

Drill a hole through the seed being careful not to press too hard, let the drill do the work. Too much pressure may cause the seed to split where you don’t want. You may have to go through a few practice seeds to get a feel for it.

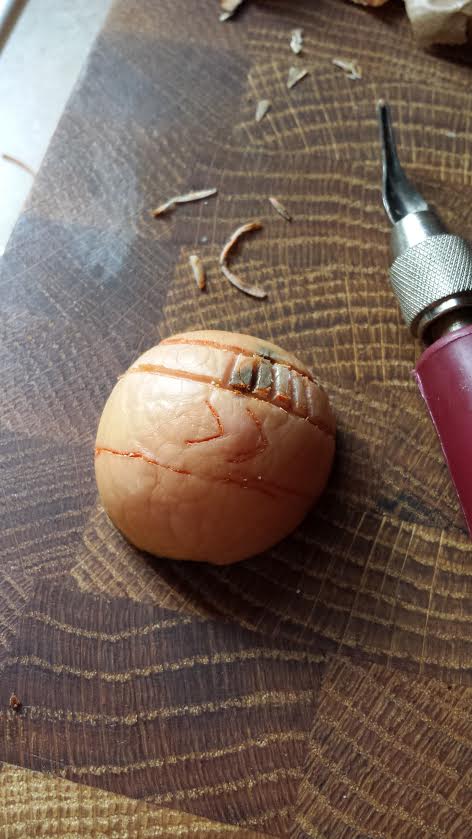
Start carving! You can lightly scratch designs into the seed with a pencil first as a guide.

Pic 6 Pic 7

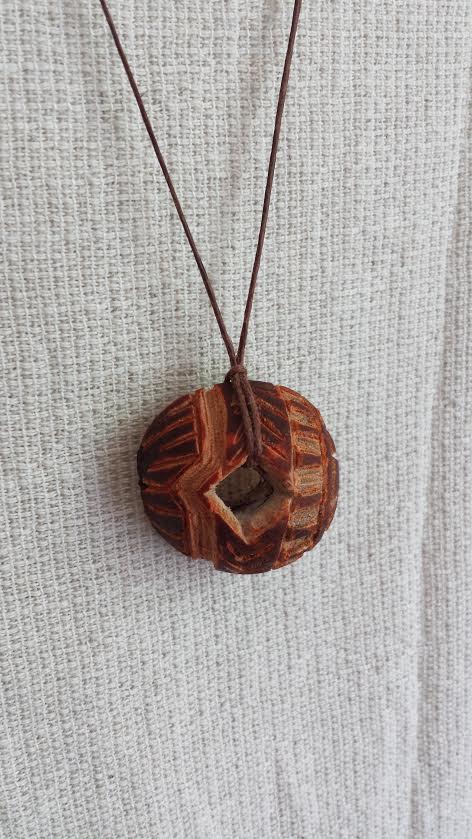
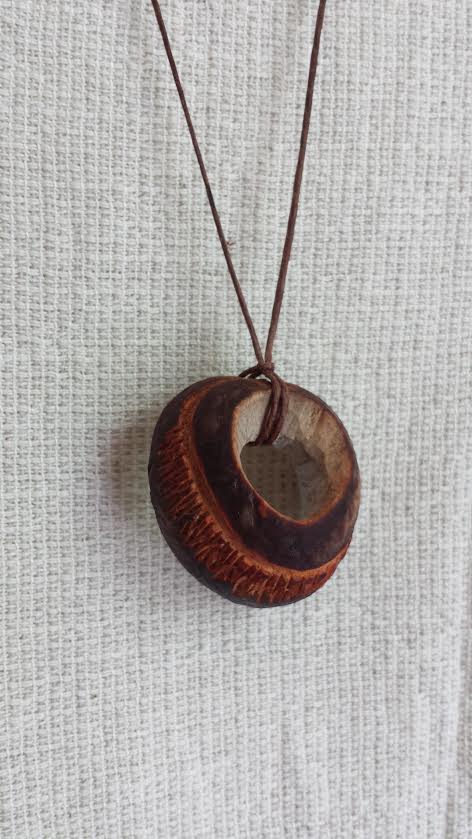
For this tutorial I carved one pendant with a little mountain landscape, one that was inspired by mud cloth designs, and lastly a pendant with a more simplistic organic shape. I tried to make the drilled hole an intentional part of the design.

pic 9 Pic 10 Pic 11

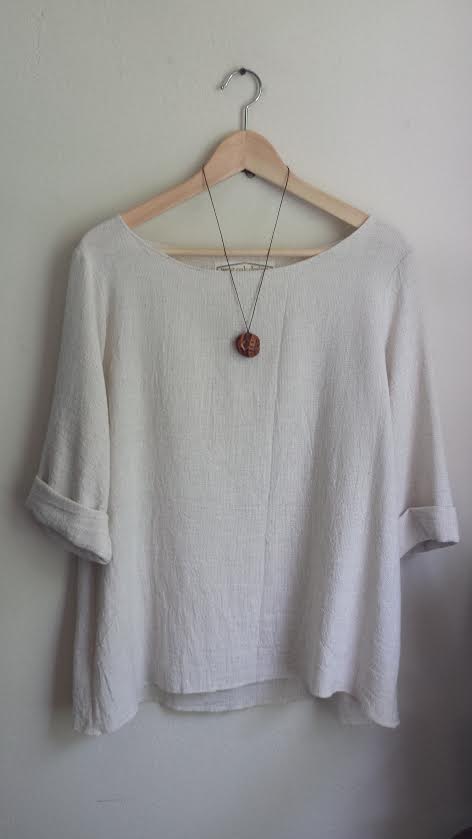
String your new pendant onto your rope/string and tie in the back at your desired length.

If you’d like to give your pendant a nice finish, try wiping with a cloth that has been lightly dipped in mineral oil.

Now throw those seed shavings and skins into a ziplock bag and toss them in your freezer until next time when I share a way to turn those scraps into a natural dye.

—————————————————————————————————————–
Christie Sommers is the designer and maker behind West Oak Design. She handcrafts small batch and one of a kind goods for home, women, and kids in her Wyndmoor, Pa studio.www.westoakdesign.com

Posted in craft projects | Tagged , , , , , , , , , , | Leave a comment

Meet NEW ASCB Vendor Leanne Tremblay of Loomination

I’m Leanne Tremblay, the weaver behind Loomination, based in Lowell, MA. I fell in love with weaving as an art student and bought my first loom right after grad school, almost 10 years ago. After working in arts and nonprofit administration for several years, I took my business full time in the fall of 2013.

Image3My studio is in a giant live/work industrial loft at Western Avenue Studios & Lofts in Lowell, MA, a complex of historic mill buildings that are home to over 300 artists. Lowell was the birthplace of the American Industrial Revolution and there are dozens, maybe hundreds, of old mill buildings that have been transformed into studios, condos, schools, restaurants, and small businesses.

Image5A lot of artists and craft hobbyists talk about their tendencies to hoard fabrics, beads, paint, pretty much any kind of supply they can get their hands on. Here at Loomination, it’s all about the yarn. I usually have about 250-300 pounds of yarn on hand, and I use it up really fast!

Image4Every product I create is made using fabric that I have woven myself. I start with the yarn (of course!) and thread it on to my vintage handloom, a huge wooden machine that is operated by hand. It can take up to 8 hours for me to prepare the loom before the actual weaving can begin. After the fabric is woven, the next step is to wash and shrink it before sewing into the final product. The fabric shrinks A LOT, usually 15-25% for most pieces, although it depends on the fibers I’m using. Calculating shrinkage is a big part of the process.

Image2My newest collection of tableware – tea towels, placemats, and table runners – is what I’ve mostly been working on lately. I just started making placemats a few months ago and I’m a bit obsessed with them – there are so many different color combinations that I’ve been dying to try. Most of my home textiles are inspired by vintage feed sacks and ticking fabrics, everyday designs that are timeless and classic.

Photo by Heather Ahrens

Photo by Heather Ahrens

Another project I’ve been excited about is a series of limited edition bamboo scarves. I love to play with color, so I’ve been hand dying a lot of the yarn, but many of the pieces are black and white, giving a stark, graphic contrast. Bamboo might just be my favorite yarn to work with and to touch. It is SO soft and has a wonderful sheen and drape. It’s like silk, but even better, and is sustainable, which is a huge bonus.

Image1I’m really excited to participate in the Asbury Park Art Star Craft Bazaar – it’s my first ever show in New Jersey! The location is just fantastic and a few of my friends – Christine Brown of Fawn and Heather Wang Jewelry – are also coming down from Massachusetts, so make sure to come see us. You can also find my work online at www.loomination.net.
Posted in ascb, Featured Artist | Tagged , , , , , , , , , | Leave a comment

Meet ASCB Vendor Spaghetti Kiss

Spaghetti Kiss2
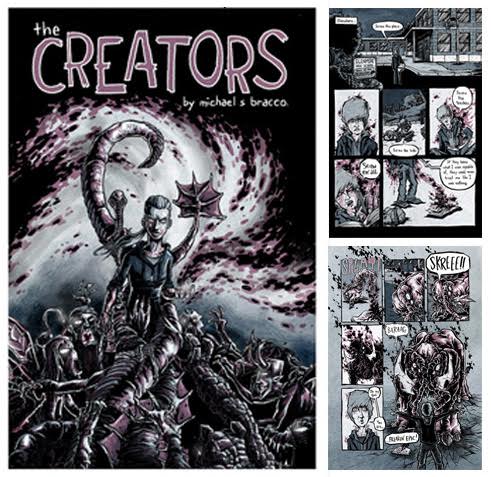
Hello there! My name is Michael Bracco and I am the artist, writer, screen printer, and general weirdo behind Spaghetti Kiss; a company featuring my hand screened apparel as well as my graphic novels, “NOVO”, “Adam Wreck” and “The Creators.” The work I create is an extension of the geeky kid I was, who escaped through comics and sci-fi/fantasy movies, only now I get to escape through my own creations. In most of my work, you can see that I really enjoy hybridizing animals, machinery and other strange things to create some off the wall designs and stories.

Spaghetti Kiss1

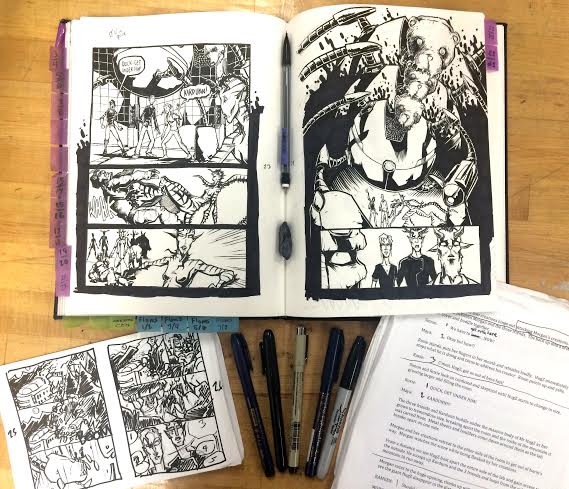
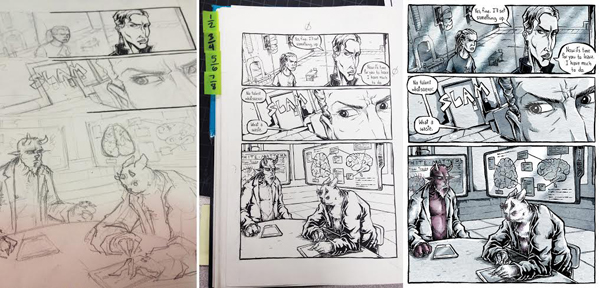
My process, whether I am designing a tee shirt or the next page in a book, always starts in the same place; my sketchbooks. I am constantly sketching, researching, plotting and taking notes before starting a ‘final’ drawing which is also done in a sketchbook so that I can keep my work portable and keep it going anywhere at the drop of a hat. As far as tools, I always work in Strathmore 400 series books and use an assortment of pens and markers including microns, zebra brush tip pens and sharpies.

Spaghetti Kiss3Spaghetti Kiss6

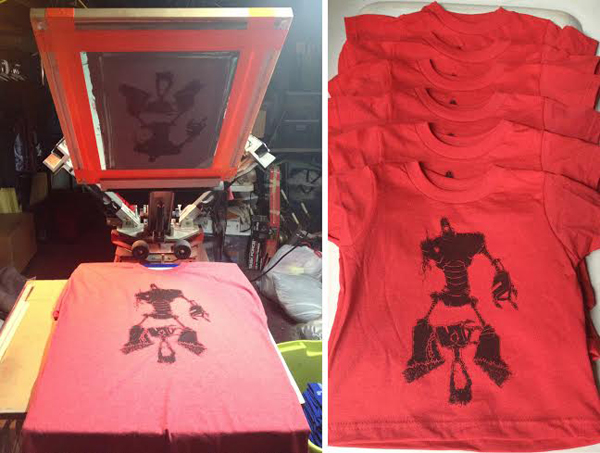
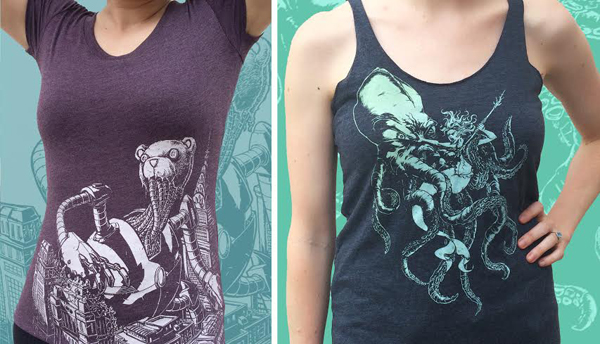
In my apparel designs, I find that beyond the illustration and its concept, the design and placement of a print on a piece of apparel is really important. I love when a creature feels like it is crawling across someone’s chest or a city is rising up from the bottom of a shirt. Sometimes I have placement in mind when I first start sketching while other times I am playing around with the placement as I am pulling the first couple of prints.

Spaghetti Kiss4

When it comes to comics, the process is a bit more intense. After I come up with a concept for a story I need to write an outline or “Beat Sheet” while doing tons of research and character sketches. Then I start writing scripts for chunks of the stories depending on if I am writing chapters, issues or whole books. Once the script is done I will storyboard 2 pages or a spread at a time and then do the pencils, inks and lettering directly into my sketchbook. At the completion of a chapter, issue or book, I will scan all the pages, make little corrections and add color if necessary then send it off to press!

Spaghetti Kiss5

All of my work can be found this summer at the Asbury Park Art Star Craft Bazaar this July as well as Spaghettikiss.etsy.com for the apparel and creatorscomic.com for my present comic project.

Posted in artist spotlight, ascb, Featured Artist | Tagged , , , , , | Leave a comment

Meet ASCB Vendor Elaine Lai of Tough Luv Clothing

Tough Luv is a Philadelphia based fashion brand blending rock and roll, loungewear, and contemporary design aesthetic for effortless, edgy style.

Image 1

Tough Luv is the creation of designer Elaine Lai. After working for several well-know fashion brands in Los Angeles, she fell in love with the process of garment dying and the endless possibilities and uniqueness that could be achieved when subjecting finished garments to hand treatments and dyes. Combined with an eye for fine details, and a passion for music and art, the groundwork for the brand was laid.

Today, Elaine has taken the brand to the next level. With distribution in nationwide, Tough Luv is proudly made in the USA, and is sold in over a hundred boutiques and specialty stores nationwide. Tough Luv transforms staple fabrics like American cotton tee-shirt jersey and fleece into fashion forward designs without sacrificing wearability, comfort, or detailing. Tough Luv seamlessly blends edgy street looks with feminine touches, resulting in a line that is cool, flirty, and fun.
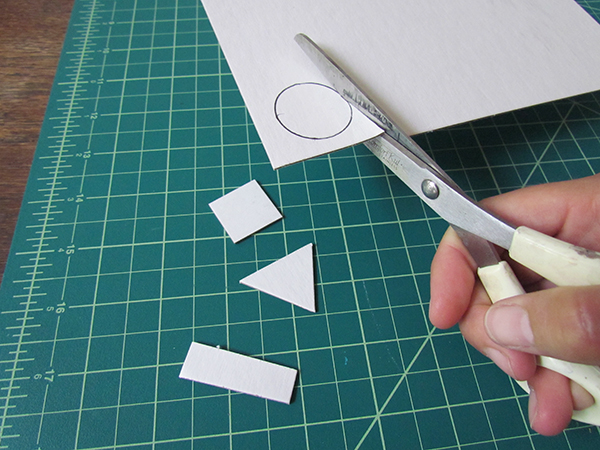
Image 2

Who Luvs Tough Luv?

The Tough Luv muse and mindset is always a large part of Elaine’s vision for the brand. Though not any one specific person, when asked to describe her, Elaine knows exactly who she is. “Her taste is not mainstream. She likes music on the edge and style the same way. She enjoys live bands and gallery openings, fine dining and vintage shopping. She wears boots with her dresses and heels with her favorite tee. She is not trendy. She is successful, headstrong, and unique. She appreciates romantic notions but understands Tough Luv.”

Our Designer:

Image 3

Designer Elaine comes from a family whose history is a melting pot of culture and inspiration. Her mother immigrated to America from Hong Kong and brought with her a passion for designing and making her own clothes, while her grandmother came to the United States in the 1940’s from Scotland. It is this combination of cultures that defines Elaine as a designer, fusing old world European traditions with the functionality that fast-paced, technology-driven, metropolitan life demands.
Elaine attended OTIS College of Art and Design in Los Angeles where she studied fashion design but later dropped out. Instead, she received a Certificate of Completion from the famed Central Saint Martins College of Art and Design in London for Experimental Fashion. Since then, Elaine has worked for several well-know fashion brands and has evolved into a well-rounded designer who takes pride, and specializes in American-made fashion, a passion that she applies when designing Tough Luv season after season.
—————————————————————————————————————
Visit Tough Luv Clothing Online http://toughluv.com/
And at our Upcoming Art Star Craft Bazaar in Asbury Park on July 25th + 26th, as well as our Art Star Pop Up Market at 2nd Street Festival on August 2nd!

Posted in ascb, Featured Artist | Tagged , , , , , | Leave a comment

Make This: Quick + Easy Matte Medium Transfer

Photos + Tutorial by Bonnie Kaye Whitfield

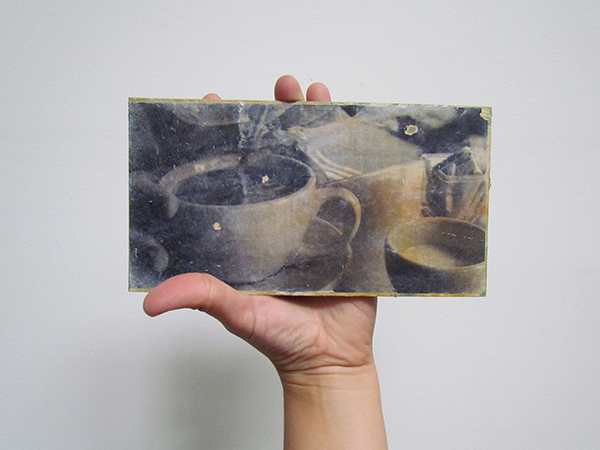
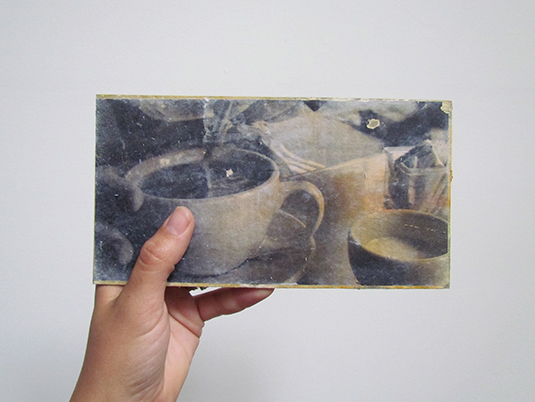
Here’s a quick and simple image transfer for using matte medium and a photocopy of an image. It’s a helpful trick for adding layers of imagery to mix media works of art. On the other hand, it can also be a beautiful way to create a piece for your home or a friend that encapsulates a memory or person.

Blog_8_Pic_1

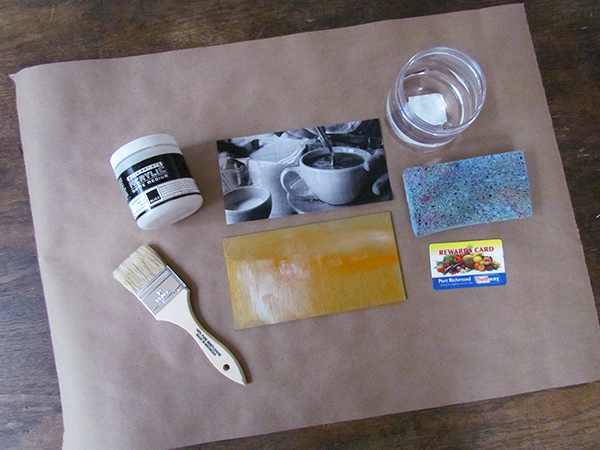
You will need:

photocopy of image to transfer / copy in reverse if it matters to the image
thick paper, canvas, or wood to use as background
matte medium
foam brush or wide brush
old plastic card or brayer
container for water
sponge (optional)
hair dryer (optional)

Blog_8_Pic_3

Gather your materials. Make a photocopy or laser print of your image that you want to transfer. You need the toner in the paper, so an ink jet print will not work. I recommend starting with a small image the first time you try this process.
Depending on your design or what you want to make, if you want a background to your image then you’ll want to do that first. Go crazy, if you like, with painting a simple background using paint or ink washes. Let the background dry completely.

Blog_8_Pic_5 Blog_8_Pic_4

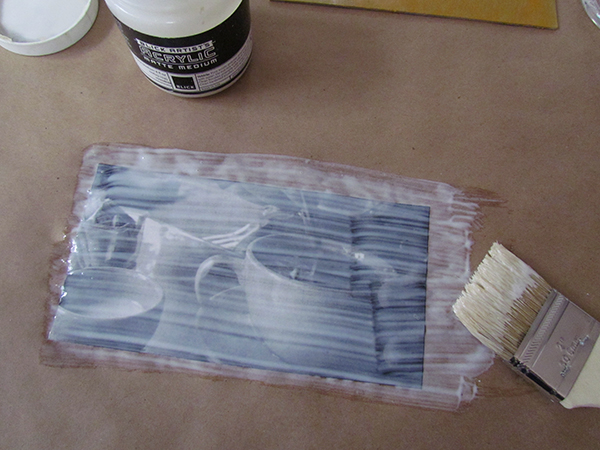
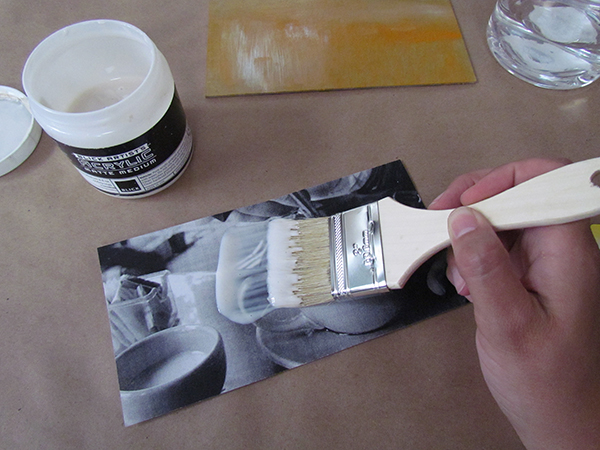
Cut out the image that you want to transfer, removing any excess paper. Using a foam brush, brush on matte medium on the frontside of the entire image, using a smooth and thick coat. Foam brushes are ideal since they don’t leave many streaks, but any brush can work.
Blog_8_Pic_6

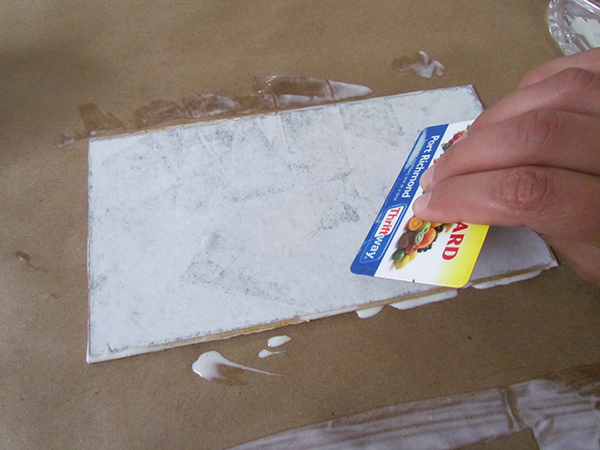
Flip the image over onto your background. Use a brayer or old plastic card to smooth out the image and make sure that it has solid contact to the background. Any air bubbles may result in small areas of the image not being transferred. Let dry completely. Feel free to use a hairdryer to speed up the process.
Blog_8_Pic_8

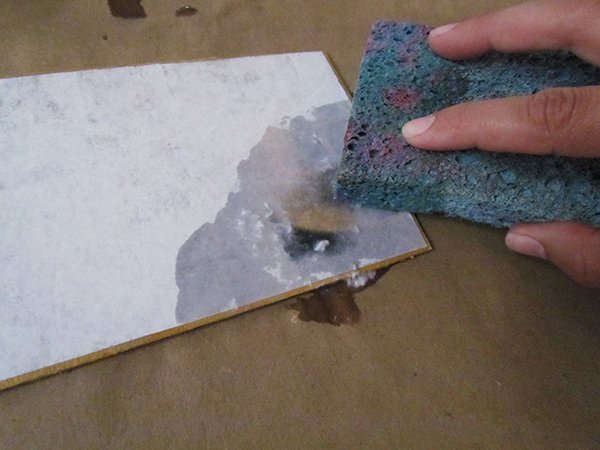
Once the image dries (the paper will turn opaque again), grab your water container and sponge. Slowly use a damp sponge (or your finger) and work in a small circular motion to begin to remove the paper backing. This might take a while so put on a good podcast or your favorite Netflix show.

Blog_8_Pic_7
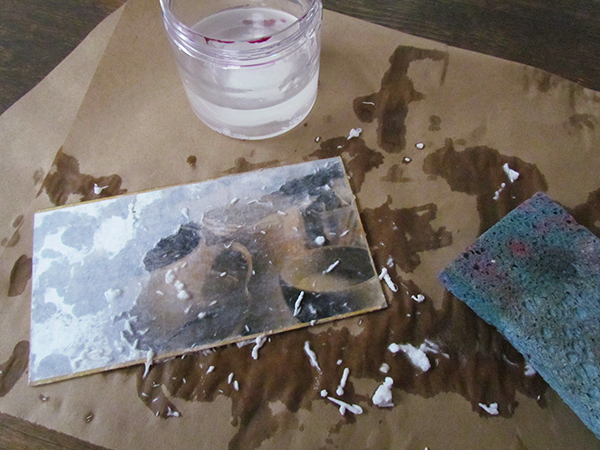
Try to work slowly, but if some of the transfer rubs off, it will just add to the rustic quality of the image. You’ll likely need to repeat this process a few times. As the image dries, any fibers that are not rubbed off will continue to cloud the image. Once you get the image to your satisfaction, give the image a top coat of matte medium to seal it.

Blog_8_Pic_2

————————————————————————————————————-
Bonnie Kaye Whitfield designs and screen prints home textiles + paper goods under the name, Bonnie Kaye Studio. Products are created to inspire memories at home and around the table. A donation is made with every purchase to help feed hungry Americans.

www.BonnieKayeStudio.com

Posted in craft projects | Tagged , , , , , , , , , , | Leave a comment

Make This: Cold Brew Infused Water

Photos and Tutorial by Christie Sommers

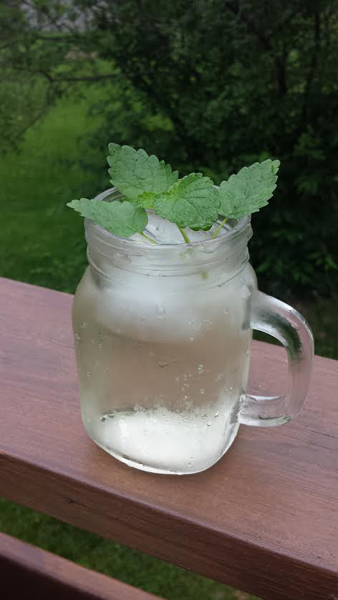
I don’t know about you, but when it’s this hot out I need something refreshing to drink and anything sugary or sweet is just no good. Here’s a little cold brew herbal tea recipe to enjoy all summer long, and you don’t have to heat up your kitchen to make it.

Photo 1 Photo 2

You will need:
*a large pitcher or jar
*spring or filtered water
*fine mesh sieve or cheesecloth
*large wooden spoon
*clean scissors or herb snips
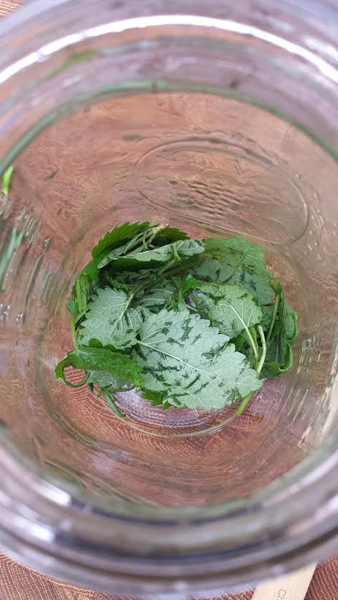
*fresh herbs (suggested combos listed below). Anyone can grow fresh herbs, whether you have a garden or sunny window ledge. I highly recommend buying a potted herb plant over the prepackaged cut herbs from your grocery store for the obvious reason that you get more out of a living plant. They are very easy to care for. The more you cut and use them, the healthier and more abundant they will be. Packaged fresh herbs are fine if you’re really not a plant person.

Start by cleaning your herbs well. Let them soak in a bowl of cold water for a bit and swish them around to remove any soil. Rinse.

Place herbs in pitcher.

Photo 3

Bruise herbs with the wooden spoon to release the oils from the leaves. You basically just smash them with the spoon.

Photo 4 Photo 5 Photo 6

*The more herbs you use, the stronger the tea will be. Because we are cold brewing, your tea will be very subtle. If you prefer stronger tea, add a cup of boiling water now and let steep for about 5 minutes before adding your cold water to fill.

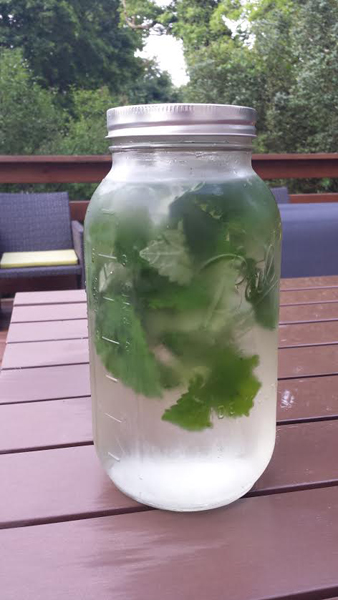
Fill the rest of your container with spring/filtered water and place in your fridge. Let steep overnight. The longer it steeps, the more flavor your water will have.

Photo 7

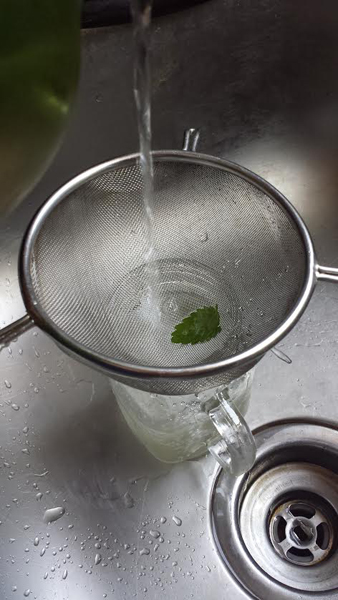
You can filter out the herbs when you pour yourself a glass or just leave ’em in there if you don’t mind snacking on them;)

Photo 8 Photo 9

Your tea will keep for about a week in the fridge.
Enjoy!

Some herbs/combinations to try:
Lemon Balm & Rosemary (used for this tutorial)
Lemon Thyme
Mint
Chamomile & Lavender
Hibiscus & Raspberry Leaf
Ginger & Basil

—————————————————————————————————————

Christie Sommers is the designer and maker behind West Oak Design. She handcrafts small batch and one of a kind goods for home, women, and kids in her Wyndmoor, Pa studio.www.westoakdesign.com

Posted in craft projects | Tagged , , , , , , , , , , , | Leave a comment

Upcoming Exhibition: “Too Close For Comfort” by Marcus Benavides

artstar_marcus_4x6_front_WEB
June 27th – August 23rd, 2015
Opening Reception with the Artists:
Saturday, June 27th from 6-8pm
free + open to the public, light refreshments provided

Art Star is pleased to present an exhibition with Philadelphia based printmaker, Marcus Benavides. The show, titled “Too Close For Comfort”, will include a series of new woodblock prints by Benavides.  The exhibition will be on view from June 27th – August 23rd, 2015.  There will be an opening reception with the artist on Saturday, June 27th from 6-8pm.   The reception is free and open to the public and will include light refreshments.

The artist states, “Looking at a tree so closely, you fail to see the forest.” In “Too Close For Comfort” Marcus Benavides will line the gallery walls with new woodblock prints that each depict macro views of a small part of a larger piece, which will be revealed to the viewer when they come to the final image within the exhibition. Marcus writes, “Macro views of objects tend to abstract textures and patterns located within. Thus, distracting the viewer from what they are actually looking at. The extreme close-up can then distort your perception of reality. This perhaps can stand as a metaphor for many things; but, for the purposes of this art show, it represents an inability to accurately view the world. It is a hyperbolic, satirical statement about a problem that I, if not society in general, may have.”

Woodblock printing lends itself to this concept. Marcus writes, “I find that by carving wood, I am physically changing the material. While paint can display imagery or a message on top of a material, woodcarving exposes parts of the naked grain. So, in manner of speaking, this allows the wood itself to speak. The grain of the wood even influences my mark-making as I gouge out sections. This coupled with the parameters of woodcarving tools, provides a distinct pallet of marks to utilize. As I use hundreds of thousands of marks to make up one image, the medium also provides ample room for discovery and unique expression.”

Marcus Benavides is an artist, printmaker, and small business owner based out of Philadelphia. He holds a Bachelor of Fine Arts degree in Printmaking from Texas A&M University – Corpus Christi and a Master of Fine Arts degree in Printmaking, from the University of Wisconsin. He has displayed his work in multiple national and international art shows, including exhibits in New York, Houston, Chicago, Beijing, and Athens, Greece. He has previously received grants from the Vilas Travel Program, the Arts Access Grant – Overture Center for the Arts, and holds a Purchase Award from the Porter Butts Gallery in Madison, WI. He currently owns and operates the Fishtown based fine art printing press, Red Light Press. It is here that he specializes in pulling limited edition, individual and collaborative, lithographic and woodcut prints.

Posted in Exhibitions | Tagged , , , , , | Leave a comment

MAKE THIS: 3D Geometric Wrapping Paper

Photos + Tutorial by Bonnie Kaye Whitfield

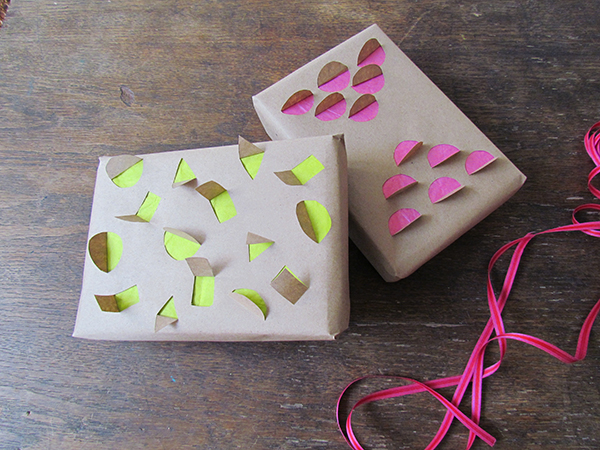
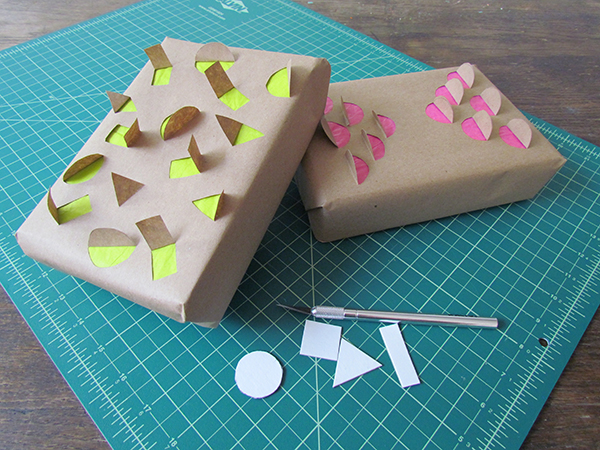
It takes just a few extra minutes to turn your gift into a conversation piece. Here’s a super simple tutorial to create fun 3D Geometric shapes on the top of your package for the next upcoming summer party you attend.

Blog_7_Pic_12

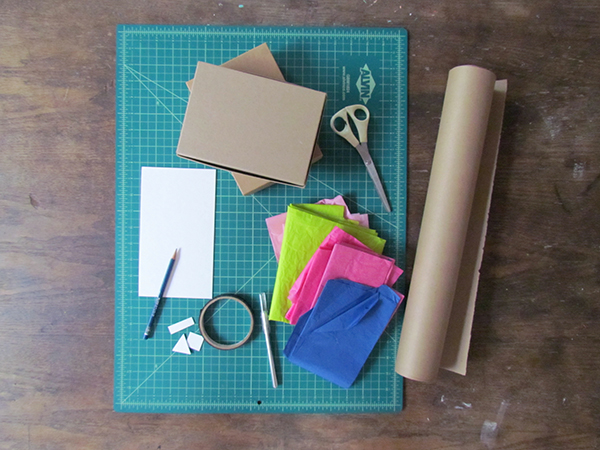
You will need:

box to wrap
colorful tissue paper
brown kraft paper
cardboard or chipboard
scissors
exacto knife
self-healing mat
tape
pencil

Blog_7_Pic_1

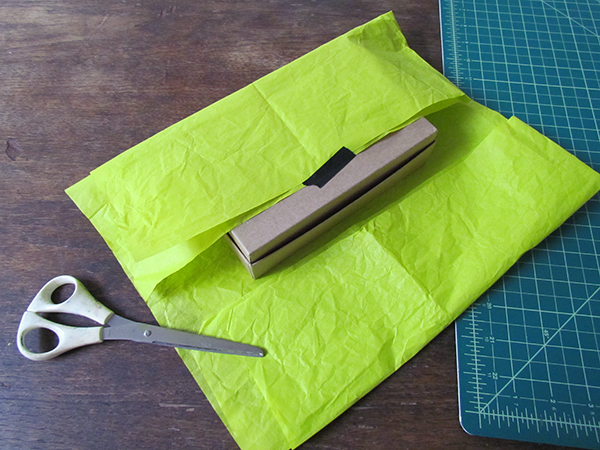
Gather your materials. Grab whatever tissue paper and solid wrapping paper you have on hand.

Blog_7_Pic_3 Blog_7_Pic_2

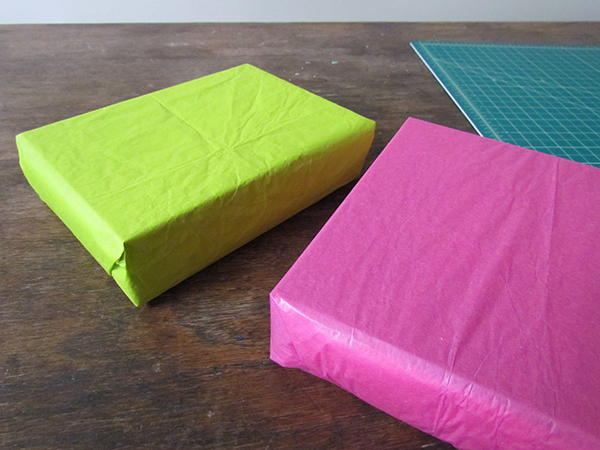
First, wrap your packages in the tissue paper.

Blog_7_Pic_4

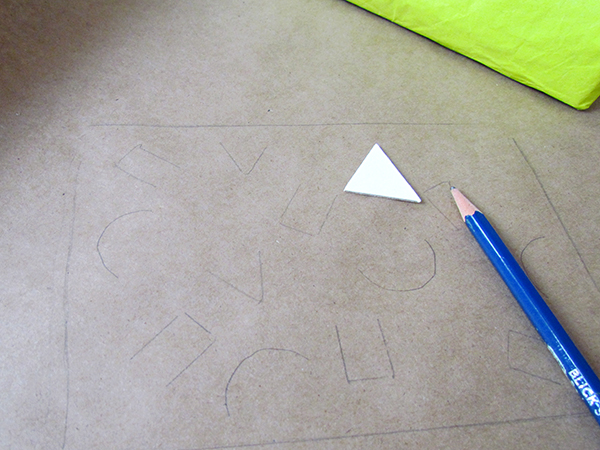
Put your packages aside and begin to draw and cut out simple geometric shapes out of your cardboard or chipboard. Keep your shapes small, under 1” in any given direction.

Blog_7_Pic_5

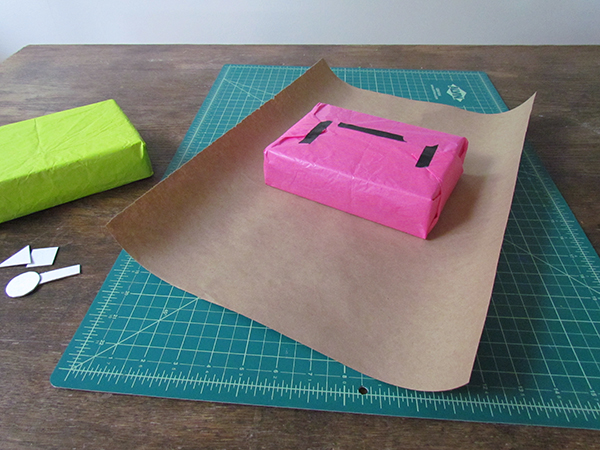
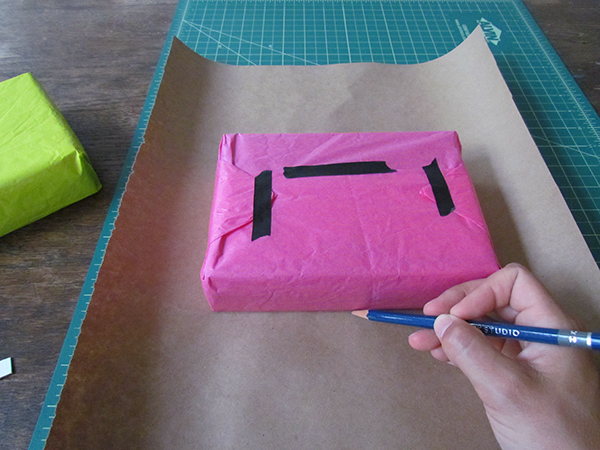
Next, cut a sheet of your solid wrapping paper, large enough to wrap your package for a second time. Place your package in the middle of the sheet and trace around the edges of the box.

Blog_7_Pic_6

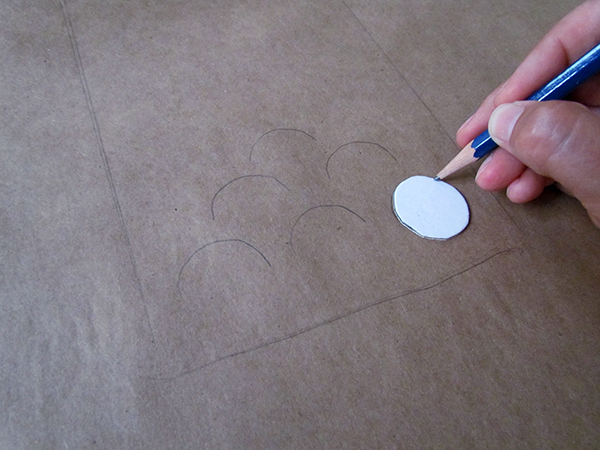
Grab your cut out shapes and begin to trace HALF of the shape within the outline of the box. For example, if you cut out a circle, only trace half of the circle. You want to make sure that half or at least one side of your shape stays connected to the wrapping sheet. Play around with patterns and arrangement with your shapes.

Blog_7_Pic_7 Blog_7_Pic_8

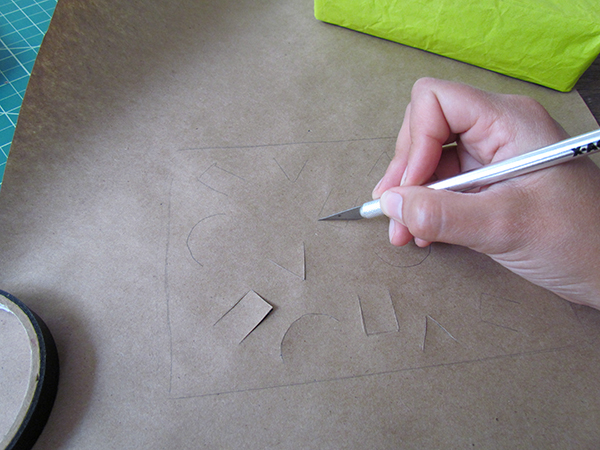
Using an exacto knife, carefully cut along the lines that you traced.

Blog_7_Pic_9

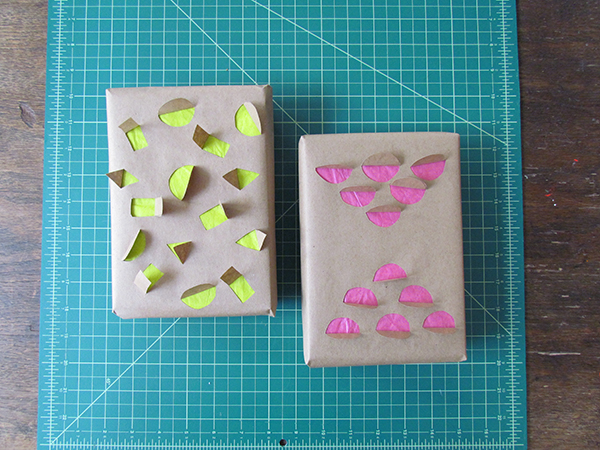
Place your box inside the outline that you originally traced and now wrap your package with the wrapping paper. Flip the box over and carefully fold back all your cut shapes. (Tip: I like to use the blade of my exacto knife to help get under the cut slits. Makes for easier grabbing and folding of the paper.)

Blog_7_Pic_11 Blog_7_Pic_10

Now you can go wow all your friends at your next birthday/babyshower/wedding!!

——————————————————————-
Bonnie Kaye Whitfield designs and screen prints home textiles + paper goods under the name, Bonnie Kaye Studio. Products are created to inspire memories at home and around the table. A donation is made with every purchase to help feed hungry Americans.

www.BonnieKayeStudio.com

Posted in craft projects | Tagged , , , , , , , , , | Leave a comment

Make This: Mini Knotted Planter

Tutorial and Photos by Christie Sommers

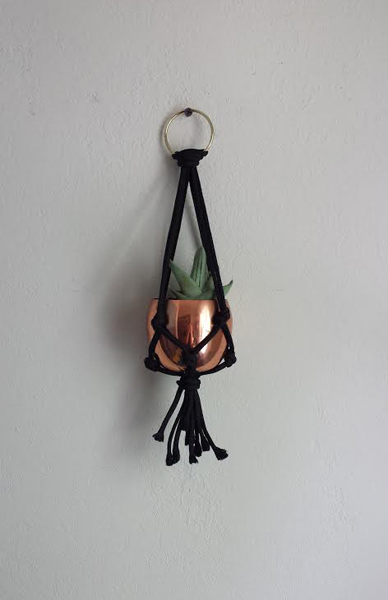
hanging planter

This mini planter is great for 3″ terracotta pots or even planted votive holders…no candles!!
It makes a great little handmade gift… quick & easy!

Photo 2You will need:
*scissors
*yard stick or tape measure
*brass ring (can be purchased at AC Moore in the knitting/macrame section…OR you can just use a key ring.
*16 feet of rope. I am using parachute cord in this tutorial but hemp, cotton rope, or even twine works well.
*you will need something to provide resistance as you tie knots. Duct tape, a wall hook, a coat rack. You’ll see what I mean below.

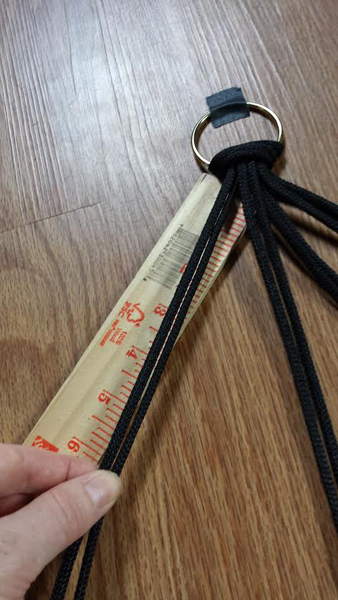
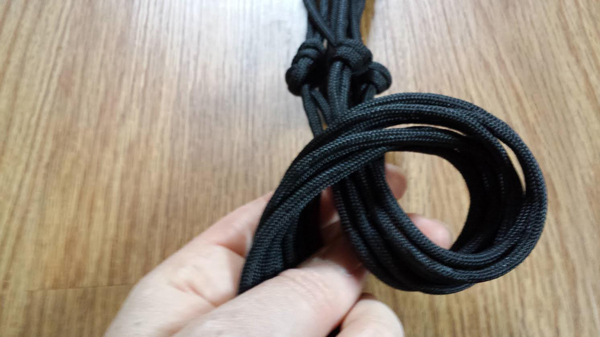
Start by cutting the rope into 4 pieces, each 4′ long
Photo 3

Gather the 4 strands and fold in half.
Photo 4

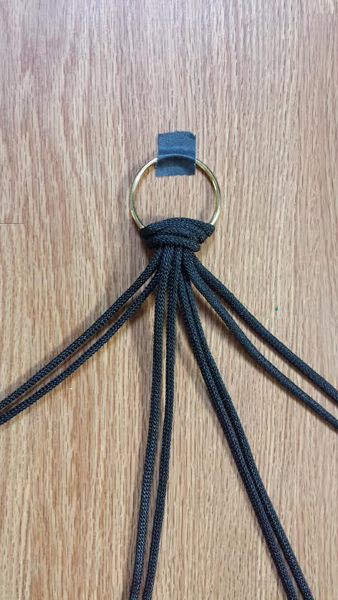
Tie the rope to the ring with a larks head knot.
Photo 5 Photo 6 Photo 7 photo 8

Tighten the larks head knot.
Photo 9

Tape down your ring. You will need a bit of resistance when you are tying your knots to simulate the weight of the plant. This will help you to line up your knots properly. You can also use a wall hook or even tie it to your shoe… if you are sitting down;)

Separate the strands into 4 groups of 2 as shown.
4 strands

Working from left to right, measure down 6″ and tie your first two strands into a knot that falls 6″ from the larks head knot as shown.
seperate
photo 10

photo 11

Continue from left to right tying knots 6″ from top as shown.
photo 12

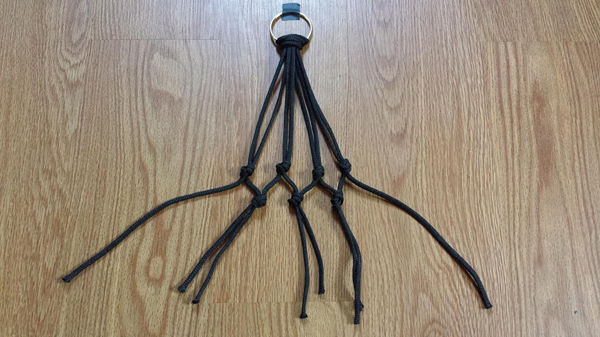
Separate again into 4 as shown
photo 13

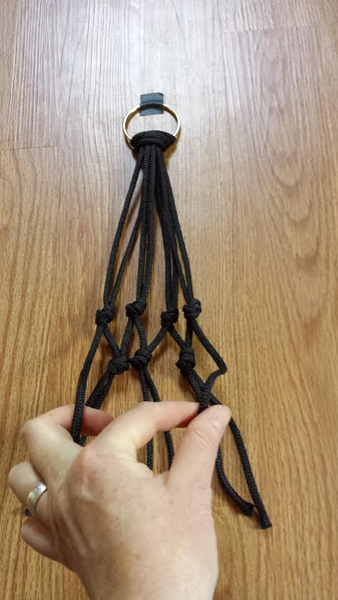
You will now tie together one strand from 1 and one strand from 2
continue with 2 to 3, and then 3 to 4 (tie this row of knots about 3-4″ below the last row of knots)
Photo 16

You will notice that there is one untied strand at the beginning and end (1 and 4)
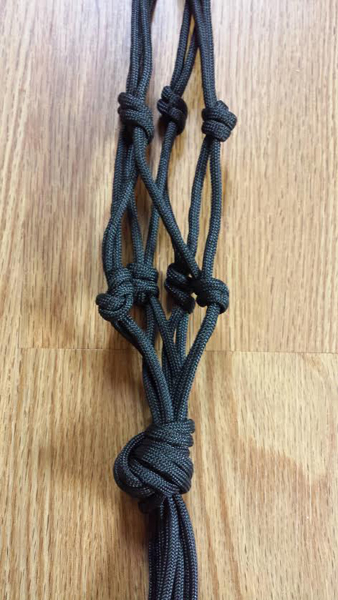
Tie these two together with the knot lining up with the last round to complete the circle.
Photo 17

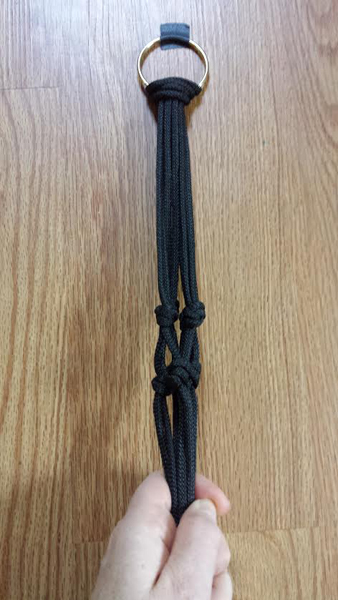
Gather all strands again into one hand
Photo 18

Tie into one large knot
Photo 19photo 20

Pop a 3″ terracotta pot or any small pot/votive holder into your new knotted planter and enjoy!

PLANTS ONLY! NO FLAMES!
just had to say it….you never know these days;)

——————————————————————————————————————————————-
Christie Sommers is the designer and maker behind West Oak Design. She handcrafts small batch and one of a kind goods for home, women, and kids in her Wyndmoor, Pa studio.www.westoakdesign.com
Posted in craft projects | Tagged , , , , , , , , , , | Leave a comment