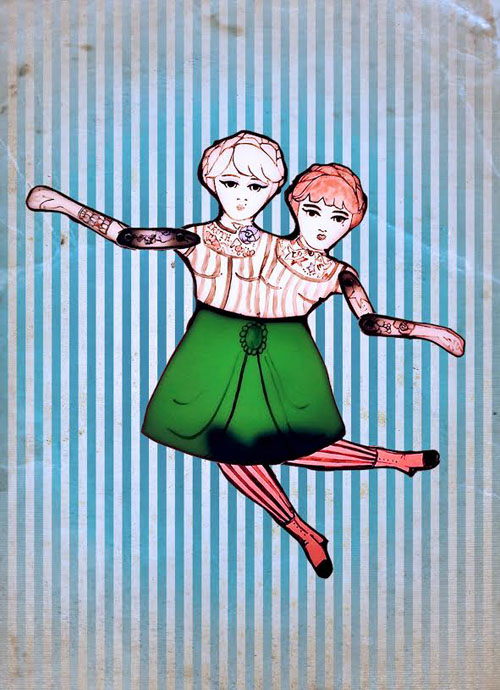
Genevieve Geer’s Le Puppet Regime Opens Friday!


Enjoy this fun trailer for Genevieve Geer of Le Puppet Regime’s solo exhibition at Art Star. The opening reception will be this Friday the 13th from 6-8pm and will include snacks, light refreshments, Cut and Paste Photobooth and first dibs on this incredible work! And find out who is really pulling the strings 😉

Learn more about Genevieve and her work here.

Posted in Exhibitions, Uncategorized | Tagged , , , , , , , , , , | Leave a comment

Our Valentine’s Day Gift Guide!

Looking for a unique gift for your special someone on Valentine’s Day?  Look no further. We’ve put together a list of handcrafted goodies that will make your girl or guy’s day!

Laure George NotecardFirst, start with the card! We’ve got a huge selection of hilariously adorable ones by Laura Berger. $4.50 each

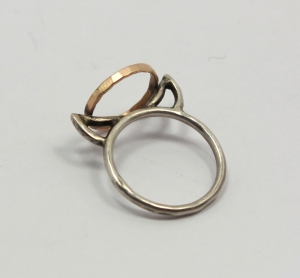
Angle Devil Kasie StrohmDoes your lady have a devilish side? How about this Angel/ Devil Ring by Kasie Strohm. Handcrafted from sterling silver with a gold fill halo. $32, various sizes.

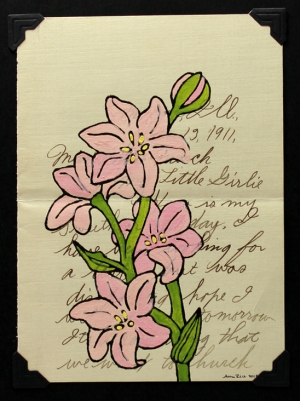
Amy Rice LilliumThis piece by Amy Rice is a hand painted Gocco print of a lillium on correspondance from 1911, how romantic! $60

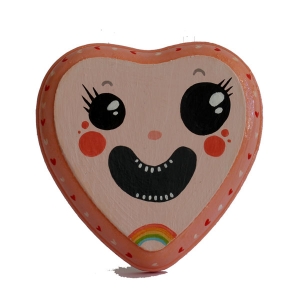
ZangerleLooking for something a little less serious? How about this wood heart handpainted with acrylic by The Maple Ridge.  Features a saw tooth hook on the back for easy hanging. This art piece is also extremely affordable, at just $40!

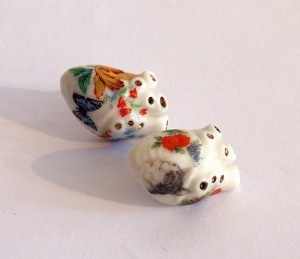
heart broochSpeaking of hearts, we love these anatomically correct ones by Julie Moon. Made from sculpted porcelain, painted gold luster and decals, these brooches can be pinned to your sweetheart’s coat and kept close to his/her own heart!  $50 each

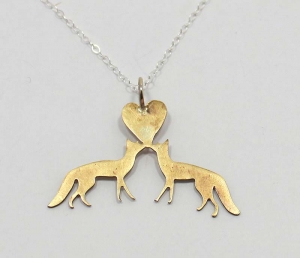
Fox Love PendantYour lady is a total fox and so are you! So pick up this Fox Love Pendant by Audrey Laine Collection. Hand cut from sheet brass and hung from an 18″ sterling silver chain. $65

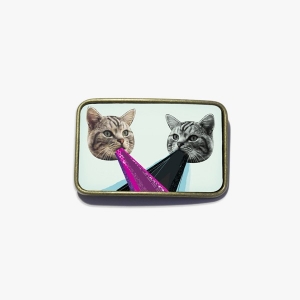
Fluffy Co BuckleYour boyfriend (like us sadly) spends far too much time watching cat videos on the internet. I think he needs this belt buckle featuring cats barfing rainbows. Though, who doesn’t need one of these. $24.

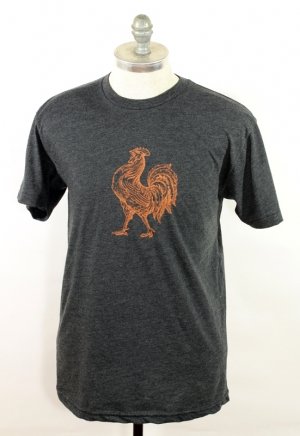
Cock Tee Cock Tee. That’s all you need to know. Get it for your man. $28

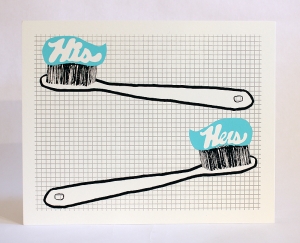
His and HersYou just moved in together! Pick up this screen print by Yardsale Press and hang it in your new bathroom, cuz its official! (Also available are Hers + Hers and His + His. I don’t have them online yet but they are available in store. If you’d like to purchase one of those online, just email us) $15

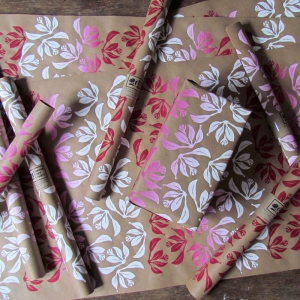
Bonnie Kaye PaperOur regulars know that we will gift wrap your purchases for free, happily! However, if you are weird like me and LOVE to gift wrap, pick up this gorgeous screen printed paper by Bonnie Kaye Studios and Do It Yourself!  Or let us do it for you!  $6 per roll.

Those are just a few great Valentine’s Day gifts ideas, we’ve got tons more.  Come on by and we’ll help you pick something special out. xo – Megan


Posted in Gift Guide | Tagged , , , , , , , , , | Leave a comment

Bonnie’s Insta-Notebook Tutorial

Photos + Tutorial by Bonnie Kaye Whitfield

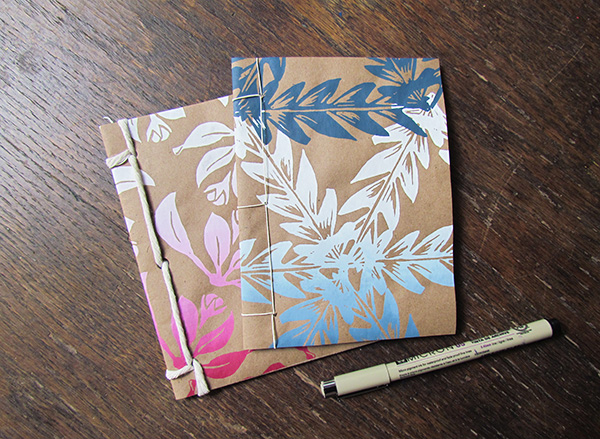
If you’re like me, you can never have too many notebooks.  Small notebooks are especially helpful for on-the-go notetaking or making quick grocery lists.  Here’s a quick Japanese-stab binding technique that will get you jotting inside in lickety split.
Bonnie_Blog2_Pic8

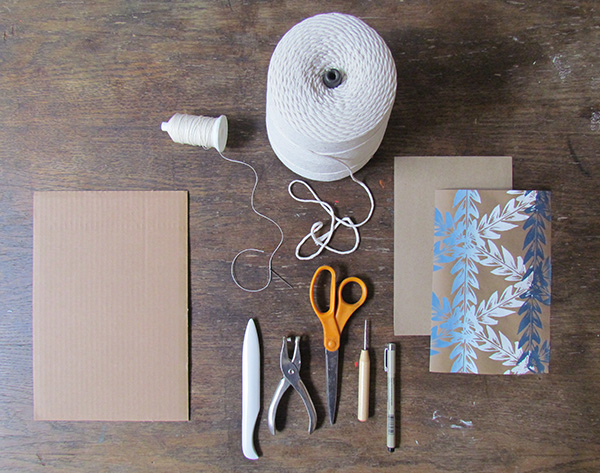
You will need:

  • decorative cover paper (I’m using my screen-printed wrapping sheets, available for sale at Art Star)
  • filler paper for the inside (I’m using kraft paper sheets, but simple copy paper is fine, just nothing too thick)
  • bonefolder (optional)
  • needle
  • thread, ideally for bookbinding
  • awl, a tool used for piercing holes (could probably also use an ice pick or ceramic needle tool)
  • piece of cardboard
  • scissors
  • pen or pencil to mark holes

Bonnie_Blog2_Pic1

Once you’ve gathered your materials, you’ll need to cut your papers to the size that you want the notebook.  I cut mine to 6×9”, with the filler paper cut ⅛ shorter on both sides so that they don’t poke outside of the cover once folded.  If you cut your paper to 6×9”, you’ll end up with a 6×4.5” notebook.
Bonnie_Blog2_Pic2

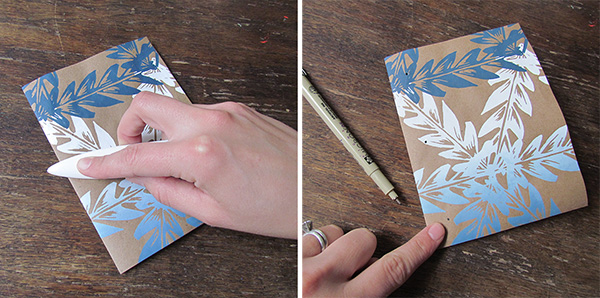
Fold both your cover and filler sheets of paper in half.  Use a bonefolder if you have one to firmly crease the fold.  You can also just use the back of your fingernail or another smooth, blunt tool.  Next, you’ll mark three dots for your holes along the spine/folded edge of the book.  Mark the holes in a line at least a ½ an inch from the spine and tops and bottoms of the book.
Bonnie_Blog2_Pic3

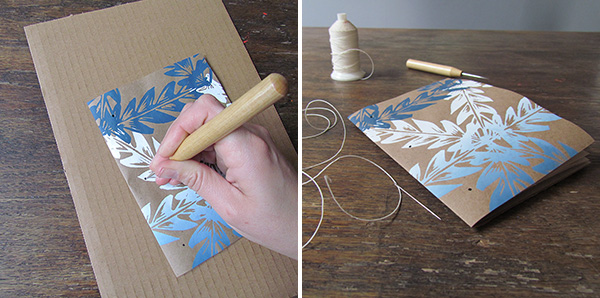
Using your awl, you’ll next pierce the holes, prior to sewing.  This is going to make sewing a lot easier.  I like to use a piece of cardboard or old magazine underneath the book while making the holes.  You can also use a small hole punch.  Next, measure your thread at least 3 to 4 times the length of your spine and cut.  Thread the needle, but do not make any knots.
Bonnie_Blog2_Pic4

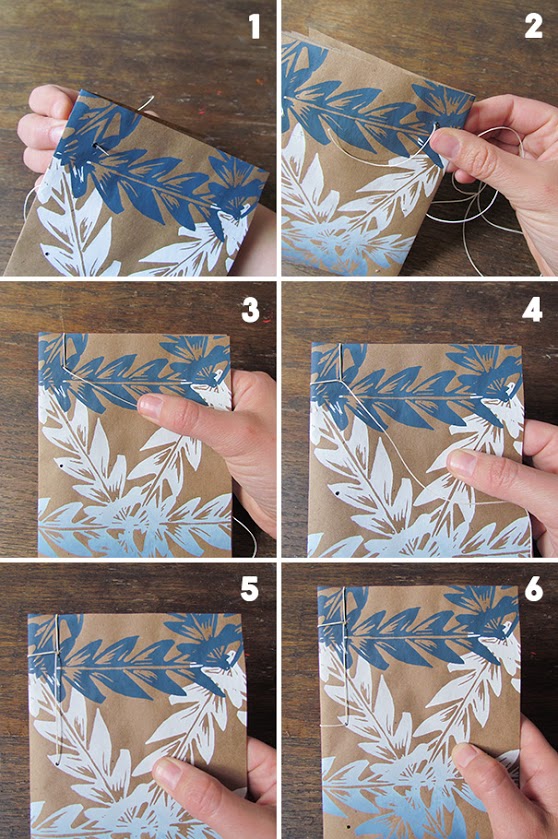
This Japanese stab-binding stitch might look complicated at first, but trust me, it’s quite easy!  You really flow through the stitches starting at the top of the book and working your way down.

  1. Start sewing from the backside of the book, in the top hole.
  2. Leave about a 2” tail of thread and hold it with your thumb.  You’ll be able to let go after the next stitch or two.  (The only knot you make for this book is done at the very end.)
  3. Thread over and around the top of the book and back through the top hole from the back.
  4. Thread over and around the side of the book and back through the top hole from the back of the book.
  5. Thread down to the second hole.  The needle will now be on the backside of the book.
  6. Thread over and around the side of the book, going through the second hole again from the front.  Your needle will then still be on the backside of the book.
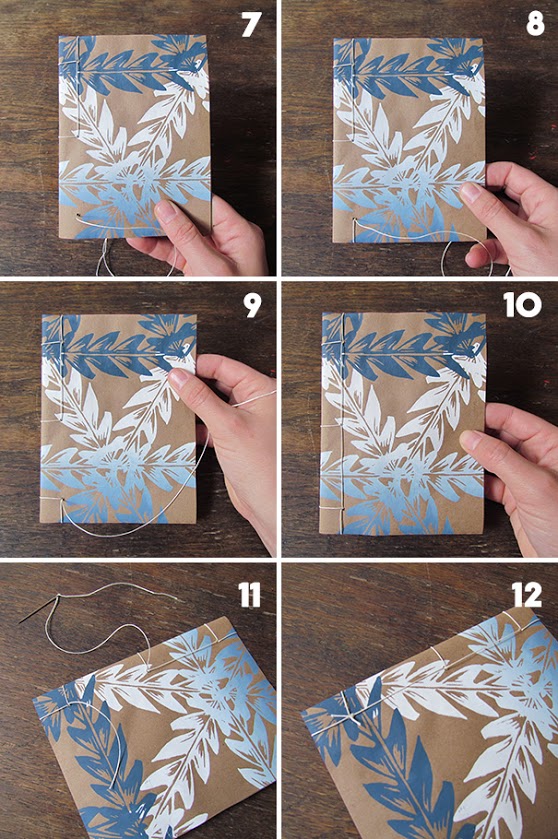
Bonnie_Blog2_Pic57.  From the back, you’ll thread through the third hole at the bottom.  You’ll now be                         back on the frontside of the book.

8. Thread over and around the bottom edge of the book, going back through the                                 bottom hole from the backside.

9.  Thread over and around the side edge of the book, going back through the bottom                       hole from the backside.

10.  Thread back up to the middle hole.  Your needle and thread will now be on the                              backside of the book.

11.  Flip your book over.  It should look like this.

12.  Lastly, remove the needle and tie the two loose ends together.  Cut threads, leaving                    about an ½” tail.  Voila!
Bonnie_Blog2_Pic7

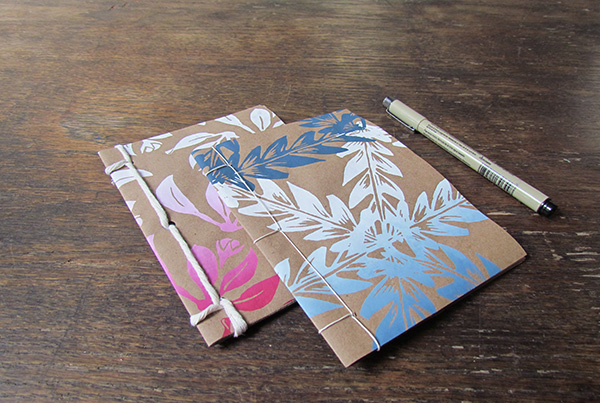
Once you’ve tied your knot, you may want to crease or score the inside pages at the binding so that the book opens more fully.  Up to you.  Also, variations include making your holes larger and sewing with a thicker thread-like material, such as cord (pictured with the pink notebook), ribbon or yarn.

You now have a notebook that you can take and use anywhere.

_____________________________________________________________

Bonnie Kaye Whitfield designs and screen prints home textiles + paper goods under the name, Bonnie Kaye Studio.    www.BonnieKayeStudio.com

Posted in craft projects | Tagged , , , , , , , , , , | Leave a comment

Art Star Craft Bazaar + Grid Magazine Partnership

We’re excited to announce that Art Star Craft Bazaar is partnering with Grid Magazine, and fellow craft fair entrepreneurs Go West!, and Crafty Balboa to produce a unique media partnership designed to further our shared goal of building a thriving craft community in Philadelphia.

Grid, a free, award winning publication dedicated to promoting sustainability, is publishing a special 16 page section insert all about Art Star Craft Bazaar, Go West! and Crafty Balboa. 30k copies of the issue will hit newsstands, coffee houses, and other retail outlets across the SE region by late March.  In addition, Grid will be set up at each of our events distributing copies as well.

Last year, Grid created an insert promoting Go West Craft Fest! and it was a huge success.  We are so excited that they chose to also include us this year!  Go here to see a sample of their insert last year to get an idea of what this year’s will look like.

This is a highly targeted opportunity to promote your local business.Your ads will not only be seen by thousands of Grid’s devoted readers, they will play a big part in helping us collectively promote our community-building events. A double win!

If you place your ad by February 13th, you will receive an early bird discount of 10% off.  Final ad deadline is March 6th.  If you are interested in placing an ad, please contact us.  We’ll send you all the sizes and rates!


Posted in ascb | Tagged , , , , , , , , , , | Leave a comment

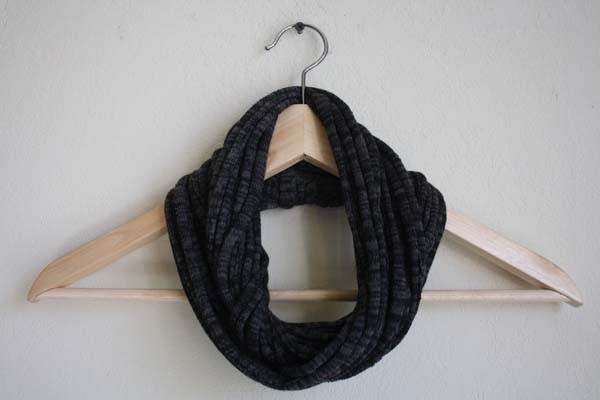
Christie’s Spaghetti Scarf Tutorial

cowl shotby Christie Sommers of West Oak Design

This is a nice little project to use up scrap jersey knit fabric or an old t-shirt.

You will need:
*scissors OR (a rotary cutter, straight edge, & cutting mat)

*A “tube” of jersey knit fabric. For a no sew version you can cut the tube from a t-shirt. To use a scrap of jersey knit fabric, cut a rectangular strip roughly 16″ x 42″ and sew the two short ends together to form a tube (folded and sewn it will measure 16″ x 21″)

01

Take your tube and cut into 1″ strips taking special care to leave 1″ uncut at the top.

02 (1)

03

When you get to the last strip, cut all the way through. This strip will become the wrap to hide the seam or uncut section at the neck.

04

05

Gather the scarf and hold at the seam/uncut section.

06

Tie the last strip to the seam/uncut section and wrap around until it is covered.

07

When you have wrapped all the way to the end of the seam/uncut section, lift the last loop and tie the end of the wrapping strip to it. Snip the remaining strip leaving about an inch.  Tuck the leftover inch under the wrapped section.

08

09

10

Now the fun part….

Hold the wrapped section and pull each individual strip as far as you can.  You may need to sit on the floor and place the wrapped section under your foot as you pull and stretch each strip which forces the jersey knit fabric to close in on itself, hiding seams and leaving neat strands.

11

You’re done! Wear it long or loop it around for a nice looking cowl.

______________________________________________________________
Christie Sommers is the designer and maker behind West Oak Design. She handcrafts small batch and one of a kind goods for home, women, and kids in her Wyndmoor, Pa studio. www.westoakdesign.com

Posted in craft projects | Tagged , , , , , , , , , , , , | Leave a comment

Bonnie’s Pop Up Valentine Tutorial


Bonnie_Blog1_Pic11
Photos + Tutorial by Bonnie Kaye Whitfield

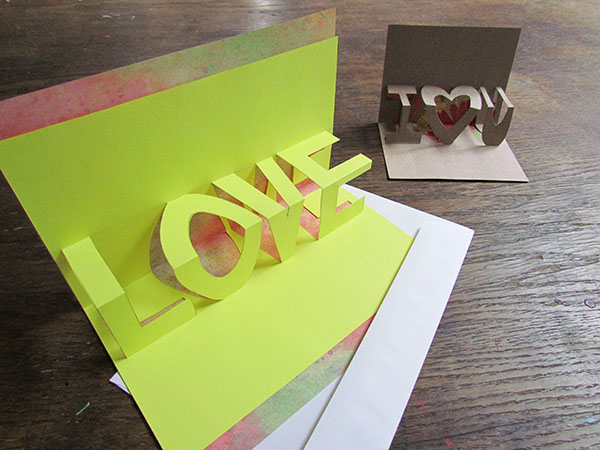
With Valentine’s Day just a couple weeks away, you might be itching to design some handmade cards for your special valentine(s).  This tutorial will show you how to create a pop-up text card with your favorite little word or message.

Bonnie_Blog1_Pic1

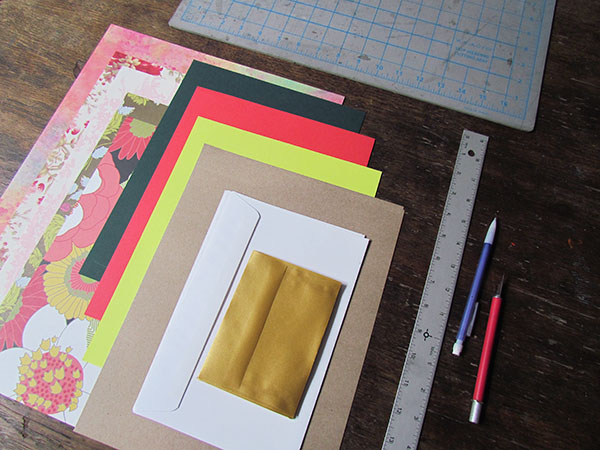
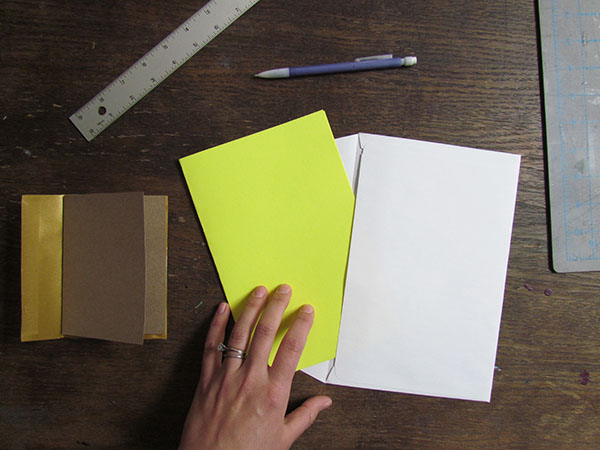
 You will need:

  • paper – both a variety of solid and patterned papers, cardstock is ideal
  • envelopes – if you plan on mailing your cards
  • self-healing mat or an old magazine
  • ruler
  • pencil
  • eraser
  • x-acto knife
  • glue stick (not pictured)

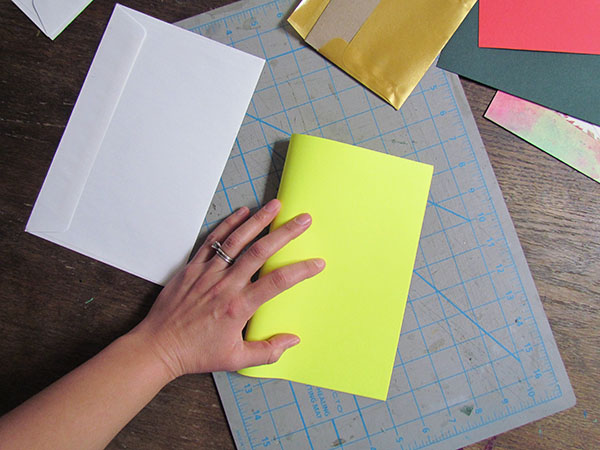
Bonnie_Blog1_Pic2First, take a solid-colored piece of paper and cut + fold to a card size so that it fits in your envelope.  If you are not mailing it or don’t have an envelop, then simply fold your paper and you can cut the card down to size later.
Bonnie_Blog1_Pic3

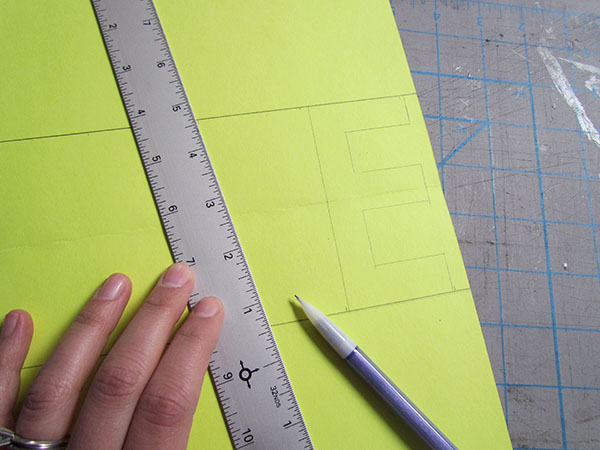
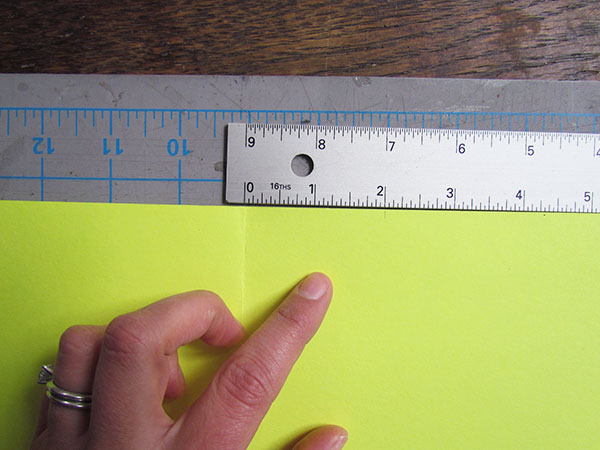
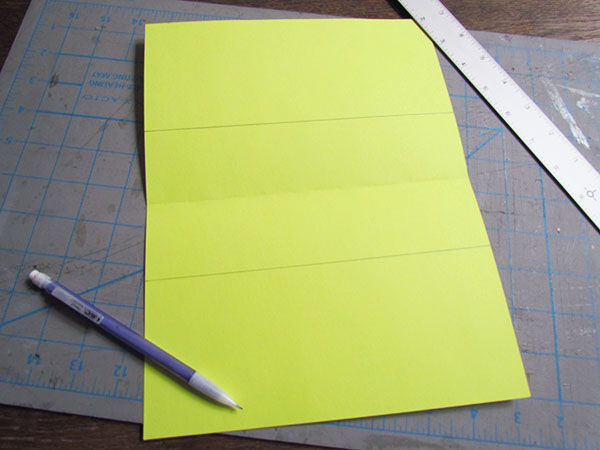
With your card open, measure 2” from the fold on each side of the fold crease and on each end of the card, and mark with your pencil.

Bonnie_Blog1_Pic4

You will connect your two marks on each side of the fold crease.  Feel free to make this line very light, as you will later erase it.  This will serve as the guideline for the top and bottom of your text.  You can also make the measurements closer or further away from the fold depending on how tall you want your letters, but make sure that the fold crease is always in the center of your two pencil guidelines.

Bonnie_Blog1_Pic5

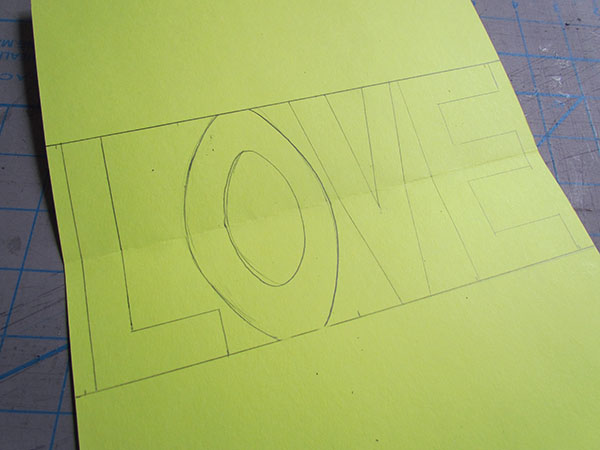
Next, begin to draw your text in block letter form, making sure that there is space between all letters and the edges of the card.  Draw your letters so that they touch both the top and bottom pencil line, with the center of the letter falling on the fold crease.   If you are using any rounded letters, make sure that they still have a solid connection to the top and bottom pencil guideline (see my “O”).

Bonnie_Blog1_Pic6 Bonnie_Blog1_Pic7

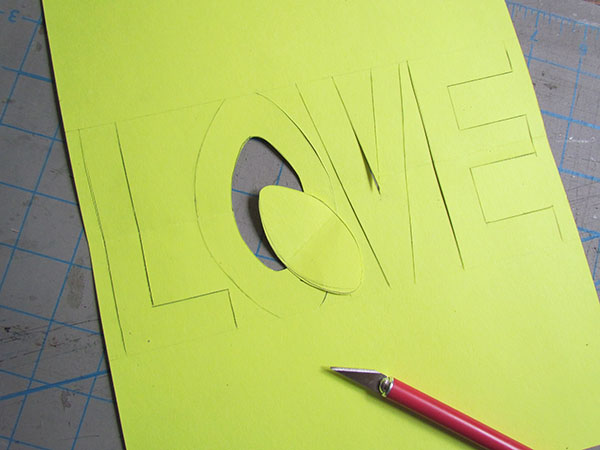
Once you have drawn out your text, grab your self-healing mat and x-acto blade and begin to carefully cut on all the text lines except the bottom and top lines.  You are not cutting out the letters, just the edges.  If you letter has an enclosed space (like my “O”) then the center will cut out entirely.

Bonnie_Blog1_Pic8

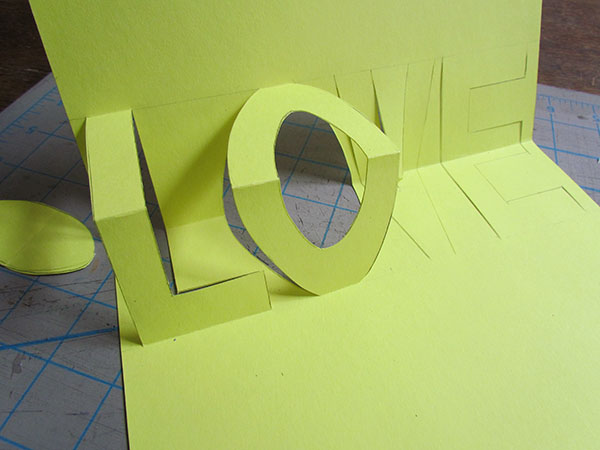
After cutting, you will refold your card.  One letter at time, you will slowly “pop-out” the letters by reversing the center fold crease and gently folding along the top and bottom line of each letter.

Bonnie_Blog1_Pic9

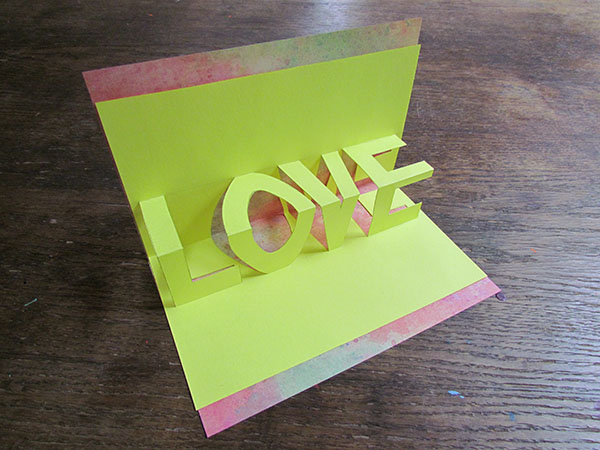
 Lastly, when you have finished adjusting all your letters, feel free to erase any pencil lines still showing.  Take a patterned piece of paper or a contrasting solid paper and play around with folding it and adding it to the backside.  At this point you can adjust the overall size of your card if you like, allowing more or less of the second paper to show.  Feel free to glue the two pieces together – just make sure that you don’t glue down any of your letters.

Bonnie_Blog1_Pic10

Now you can go wow your sweetheart with your new pop-up skills!  Happy Valentine’s Day, everyone.

—————————————————————————————————————-

Bonnie Kaye Whitfield designs and screen prints home textiles + paper goods under the name, Bonnie Kaye Studio.   www.BonnieKayeStudio.com


Posted in craft projects, Valentine's Day | Tagged , , , , , , , , | Leave a comment

New in the shop: Sweet Luka Mo

Processed with VSCOcam with f2 presetWe are so excited to be carrying local Philly baby/toddler line, Sweet Luka Mo! AND, Art Star will be the only brick n’ mortar shop in the area where you can find the popular eco-friendly brand!
“Sweet Luka Mo’s stance on baby clothing is simple: we should wish it came in our size.

Based in Philadelphia, PA, we make modern, sustainable baby and kids’ clothes built to withstand fun times, drawing our inspiration from city life, street art, and the adventures of urban kids.

It all started with our infant son Luka and a few too many unsatisfying searches for cool clothing to put him in. It seemed finding comfortable, stylish, contemporary, gender-neutral, sustainable, and ethically-made clothing was near impossible, so we combined our design and clothing construction know-how and got down to business. What started as a small, home-based/homemade clothing line has since expanded beyond our dreams, and today we’re proud to have a line that is almost entirely professionally manufactured right here in Philadelphia, with custom fabrics made in the USA.

We proudly source high quality, eco-friendly, stretchy, soft, breathable, organic cotton and bamboo fabrics as the basis of our line, for optimum comfort and optimum play. All prints and designs are exclusive to Sweet Luka Mo, inspired by today’s youths — so messy, imaginative, and destined for great things.” – Sweet Luka Mo

Here are the pieces you will find at Art Star now.  Buy in store, or on our site here

Black Splatter Leggings3

Organic Splatter Leggings $32-$36

Heart Fleece Pullover - Copy

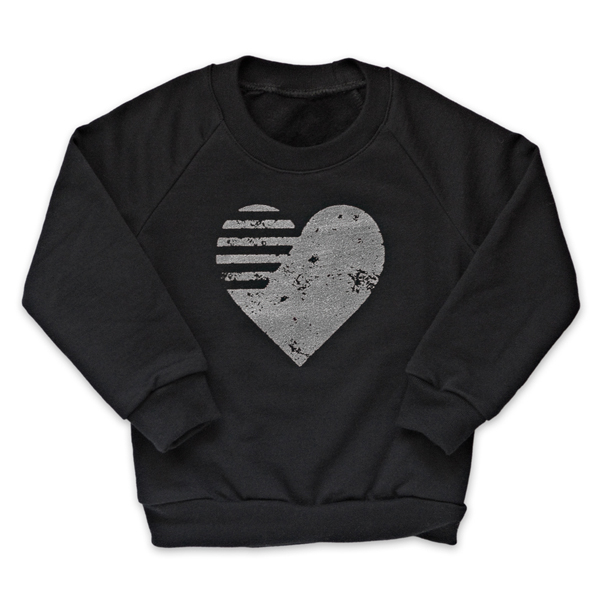
Graphic Heart Fleece Pullover, $34

Roar Thermal Metallic Gold - Copy

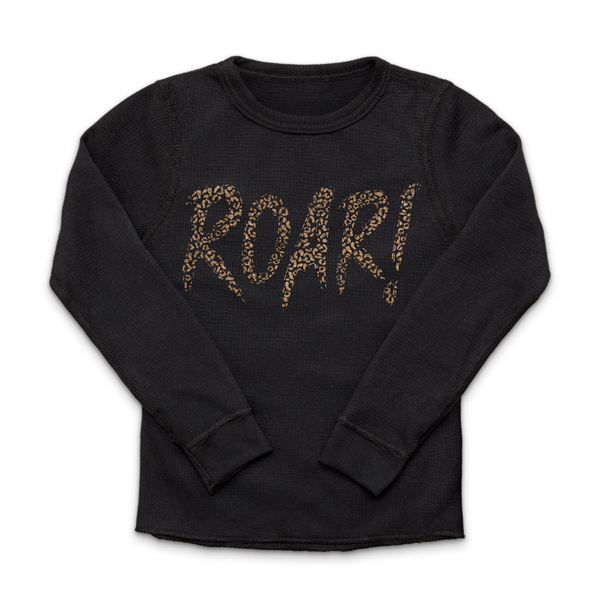
Roar! Thermal in Metallic Gold $26-$28

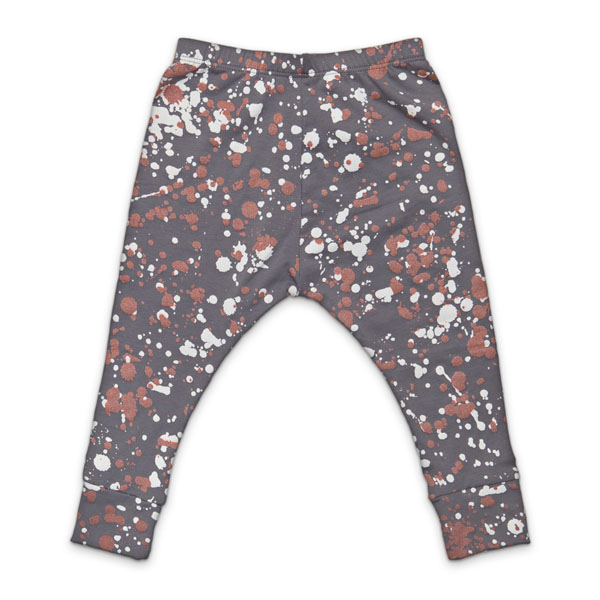
Splatter Harems in Gray

Organic Grey Splatter Harems $34-$38

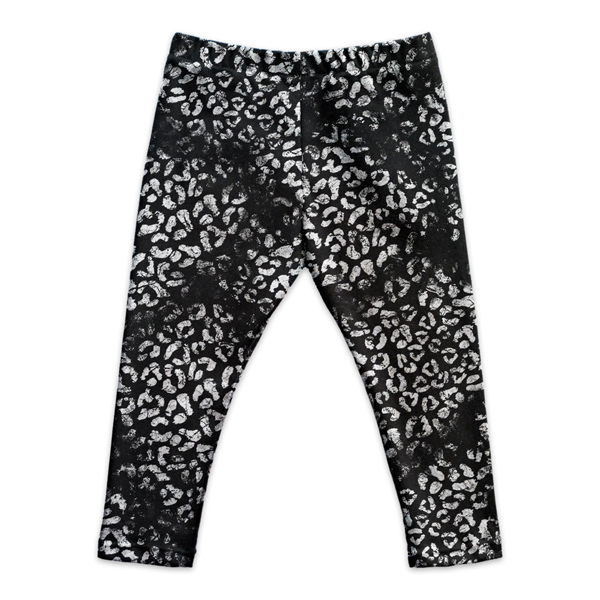
Black Pounce Leggings

Organic Black Pounce Leggings $32-$36

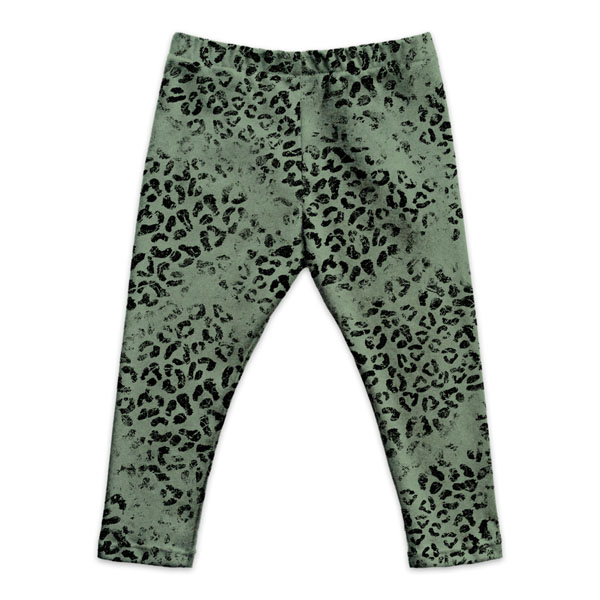
Pounce Legging in Olive

Organic Olive Pounce Leggings $32-$36


Posted in artist spotlight, Baby, clothing, fashion, Featured Artist, new product, philly, website | Tagged , , , , , , , , , , , , , , , | Leave a comment

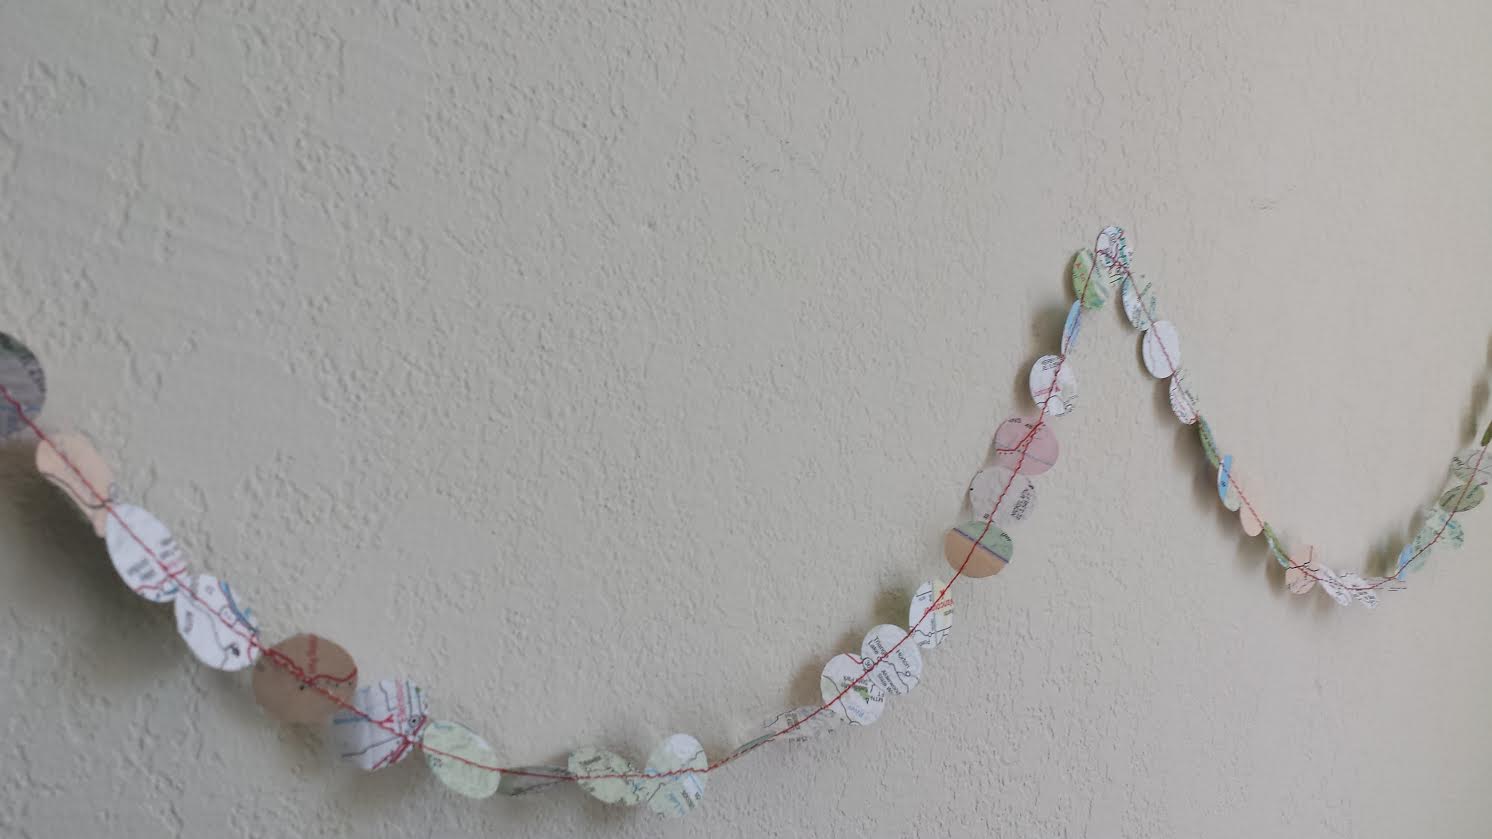
Christie’s Paper Garland Tutorial

garland2Tutorial + Photos by Christie Sommers

Try this inexpensive and easy tutorial to spruce up your place or decorate for a party. Paper garland is a great way to reuse old travel maps. You can also use colored or decorative paper purchased at your local craft shop.

You will need:

*paper….at least the thickness of printer paper, newspaper may be too thin.

*a sewing machine set to straight stitch, threaded in color of your choice

*scissors OR (rotary cutter, straight edge, cutting mat)

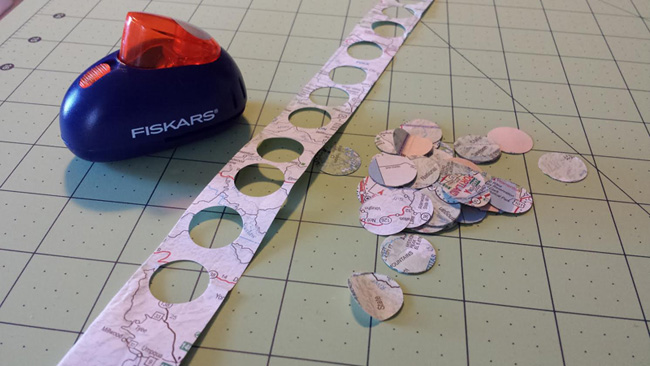
*a paper punch (I used a Fiskars 1/2″ paper punch) You can get creative with a vast assortment of paper cutter shapes found at your local craft store in the scrapbook section. Don’t go with anything smaller than 1/2″ because it will be difficult to feed through the sewing machine.

Supplies

Start by cutting your paper into strips. I cut mine into 1″ strips. Just be sure your strips are larger than your paper punch shape.

cutting

Go nuts punching out your shapes.

punch

Do a little math to find how many circles you will need to make the length of garland you want. In my case (2) 1/2″ circles equals roughly 1″ of garland.

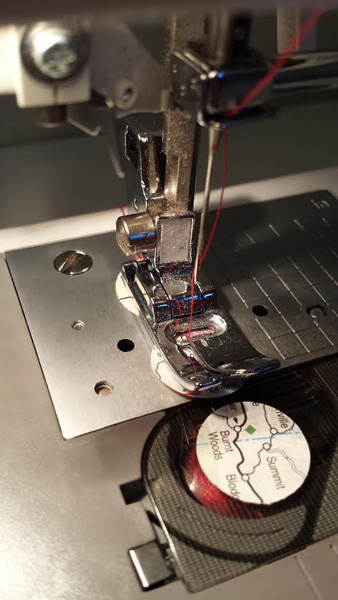
With your sewing machine set to straight stitch & threaded in the color of your choice, begin feeding each circle under the presser foot.  The feed dogs will take it from there. Have a pile of circles very close by and place one circle right after the other without overlapping.

stitch

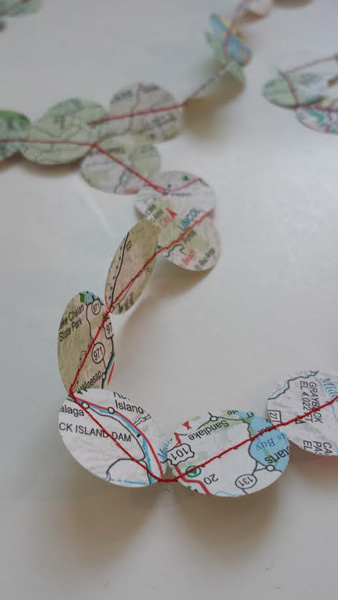
Before you know it you will have yards and yards of garland!

garland 3

To store: you can carefully wrap around a piece of cardboard until you are ready to use..

Enjoy!
——————————————————————————————————————-
Christie Sommers is the designer and maker behind West Oak Design. She handcrafts small batch and one of a kind goods for home, women, and kids in her Wyndmoor, Pa studio. www.westoakdesign.com


Posted in craft projects, crafts | Tagged , , , , , , , , , | Leave a comment

Clover Winter Market 2015

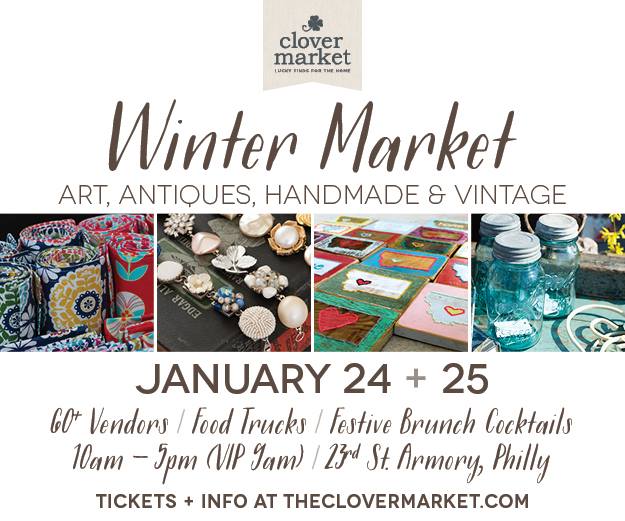
We will be popping up our 10×10 shop at the upcoming Clover Winter Market! We hope you will come out to visit us + around 50 other vendors selling handmade, vintage, and antique goods.
CLOVER MARKET 2015The 23rd Street Armory is on 23rd Street between Market + Chestnut Streets.   There is a $5 door fee (kids under 12 get in for free)…..But may we suggest you purchase a VIP Pass for $20?  This gets you some awesome stuff including admission at 9am (a whole hour to shop before the general public arrives), and a swag bag of goodies + coupons donated by vendors!  There is a coupon to use at our booth too!
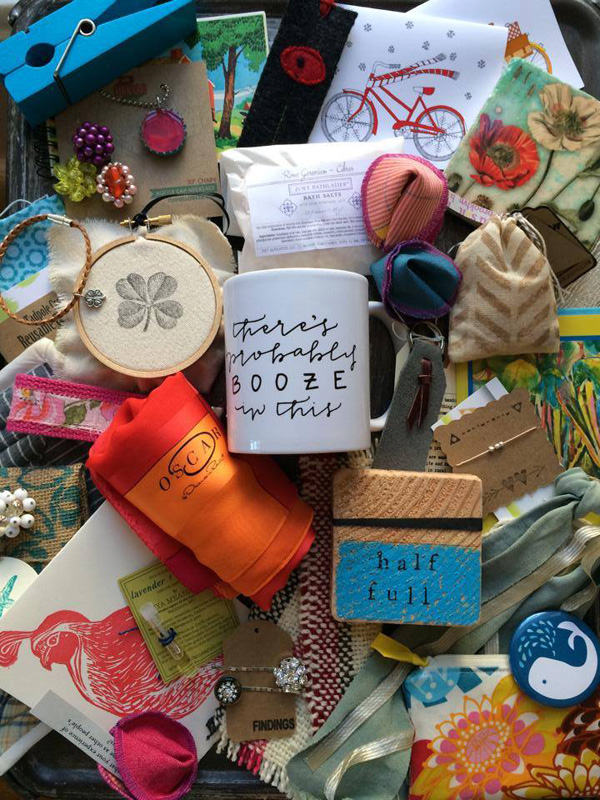
Here are some of the goodies you will find in the VIP Swag Bag
CLOVER VIP SWAGPurchase VIP tickets OR 2 for 1 tickets HERE
Visit www.theclovermarket.com for more information

Posted in craft shows/fairs, events | Tagged , , , , , , | Leave a comment

Upcoming Exhibition with Genevieve Geer of Le Puppet Regime


Le Puppet Regime by Genevieve Geer
Stained Glass Marionettes + Sculptures
“You Never Know Who’s Pulling The Strings”
February 13th – April 12th
Opening Reception: Friday, February 13th from
6-8pm

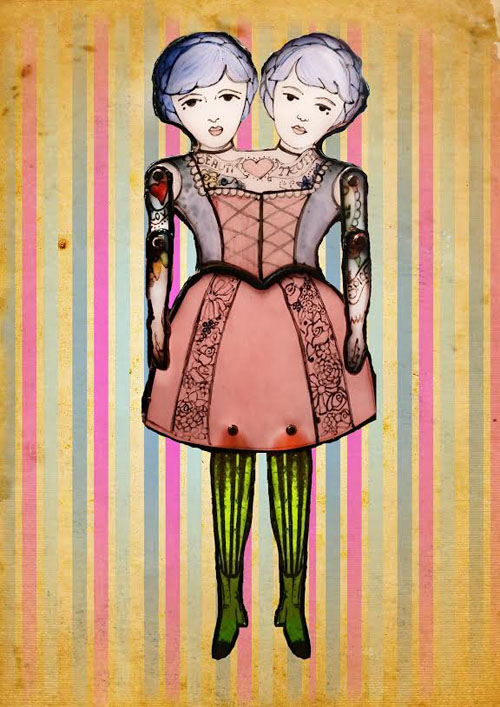
We are thrilled to announce a solo exhibition with Philadelphia artist, Genevieve Geer of Le Puppet Regime.  Genevieve makes brilliant stained glass marionettes of tattooed showgirls, circus freaks, Siamese twins, mermaids, strong men, minotaurs and more.  Each piece has movable limbs so you can contort and pose your puppet in any way you choose.

We first stumbled across Genevieve’s unique work after she applied for our 2014 May Art Star Craft Bazaar.   We had never seen anything like it before and it isn’t often that we come across cool stained glass work!  Her application definitely gave us goose bumps.  We were even more smitten after checking out the work in person.  Not only does she make marionettes, but she also makes larger sculptural wall pieces and a line of jewelry.

Her exhibition at Art Star will include her popular marionettes but also some more of her larger sculptural pieces.  The show will differ a bit from our typical exhibition.  Though the larger pieces will remain up throughout the duration of the show, the marionettes will be available to take home the day of purchase.  We will have a back stock to replace pieces as they sell.  The show will open the day before Valentine’s Day, so bring your date to check out the show, mix and mingle with the artist, enjoy a beer + snack and pick up a one-of-a-kind art piece for your special someone!

Artist Statement: Genevieve Geer’s stained glass characters are articulated, modern day people, captured in an ancient art. They are holy in their medium, hearkening back to saints and sinners in churches everywhere, but they are living contemporary tales. Instead of stained glass as static object, well placed, well lit, and coveted as an architectural asset, these pieces move themselves to center stage. By pulling the characters out of the allotted window frame, Geer begins to force a reassessment of this medium. Further, by articulating each creature and character, the audience can no longer dismiss the work as sparkly background noise. They must look at each piece and divine it’s story, what it is and where it comes from.

The Artist’s process is painstaking and involved. The first steps are drafting a basic line drawing on paper and transferring the cartoon to glass, using hand mixed powdered glass paint that is then kiln fired. Cutting the glass, coppering, soldering, drilling and piecing together the final figure allows for variations and deviations at every turn, often resulting in creatures that stray from the initial drawing by happy accident. “Powdered glass paint is a medium unlike any other–one can have a general idea of what it will do, but sometimes it’s better than me, it knows what will look best, and when that happens, if I am smart,  I lift the brush quickly off the glass, let it dry and get it in the kiln.”

Geer is constantly feeding her work, researching embroidered textiles and antique dishware patterns, ukiyo-e woodblock prints, contemporary couture fashion, Russian movie propaganda posters, illuminated manuscripts, and contemporary illustrators like Yuko Shimizu.

ABOUT THE ARTIST Genevieve Geer is a Philadelphia based artist working in glass, metal, wood and textiles. Originally from Massachusetts, she attended Parsons School of Design for Illustration and The Museum School in Boston for Animation. She moved to NYC soon after graduating and worked as a freelance prop fabricator over the next few years. When she relocated to Philadelphia in 2007, she began to experiment with a new medium, hot glass. She started out as a manager of a local public access glass studio for a year before taking an apprenticeship at Wheaton Village in New Jersey. There she developed her blown glass skills, but was also introduced to casting, kiln forming and flat glass techniques. After two years she returned to Philly and she and her husband built a studio in their Kensington home. In 2012, after seeing a stained glass show by the artist Judith Schaecter in Philadelphia’s Eastern State Penitentiary, a spark was lit and Genevieve began to research and experiment with stained glass. In this one medium she found a meeting place for her training in illustration, animation and hot glass. Her company, Le Puppet Regime, came into being soon after, and features articulated, movable stained glass characters and scenes.

Visit  http://www.genevievegeer.com/ for the artist’s full portfolio.
Find a selection of her work at our shop + on our website.


Posted in artist spotlight, events, Exhibitions, Featured Artist, glass | Tagged , , , , , , , , , | Leave a comment